
How to Make Antique Parchment
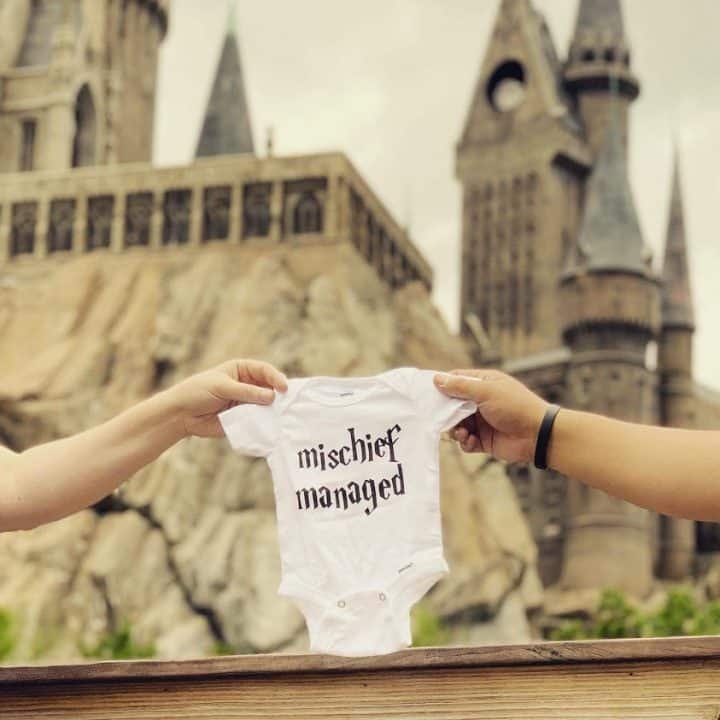
In my last post where I finally officially introduced our daughter to everyone, I mentioned that I was pretty proud of our announcement. Even though we shared it to social media and not to here. We already discussed this, you’re not mad, remember? So I figured I’d do this follow up post with a step-by-step how-to on putting together the parchment. I mean, sure, you can buy paper like that. But that’s no fun!
I guess I’ll start with what we did. The wife had this idea to announce in front of Hogwarts Castle. And really, who am I to argue that? Of course, remember, this was way before pandemics and social distancing and mask wearing – which I’m sure you’re doing every time you’re out, right? Yeah, I thought so.

Hogwarts Castle, nestled in the center of The Wizarding World of Harry Potter in islands of Adventure, is not an easy place to do anything, I’ll tell you that. Pre-quarantine, Harry Potter Land (as I call it) is consistent in being the most ridiculously packed area in any theme park here in Orlando. And for good reason too, I could legit spend all day in there just hanging out and exploring every nook and cranny. But if you tried you’d go mad by noon thanks to the bajillion tourists and Potheads Potter fans that love to homestead like they’ve never seen a Butterbeer cart before.
I’m just playing, I know the place is awesome and it’s hard to not gawk at the smallest details. But still, I ain’t lyin’.
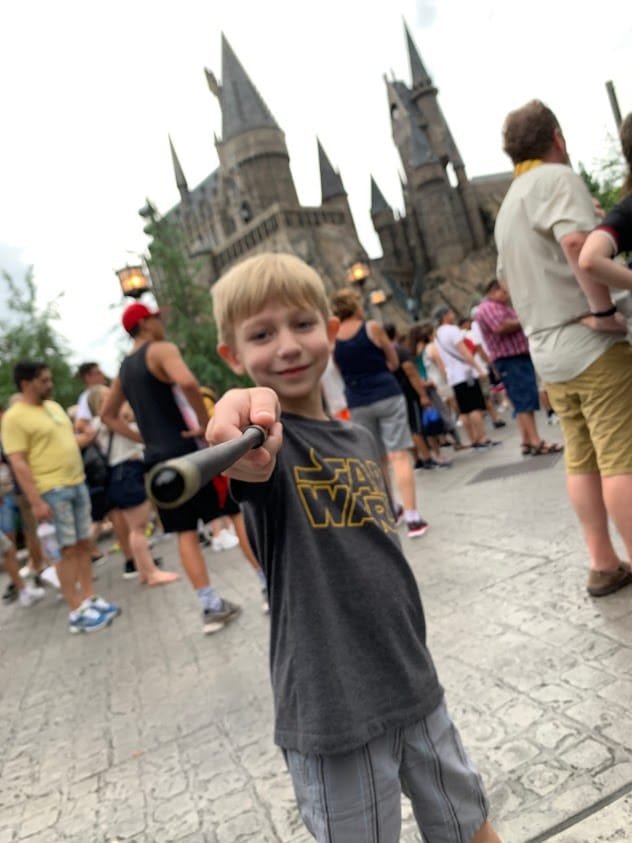
That’s why it was a great spot to announce. I’m shocked she didn’t think Disney, but we adore the Potter universe all the same. The oldest already had a wand so we had to get one for the youngest. Amazingly enough, after kinda sorta talking to the wizard at the door and slipping them a few silver sickles, the youngest was chosen by Ollivander and given a wand!…. That we had to purchase at the register if we chose to do so. Which we did, as planned.
Next, we had to find a way to take a picture on what is one of the narrowest, most busiest walkways in the park. The only way to enter Hogsmeade on that side, is through this bridge. So as you can imagine, with how busy I’m describing the area to you, that this bridge is just a constant congested chaotic causeway. (You like that? It was a stretch with “causeway” but it works!) The fact that it gives you a perfect view of Hogwarts does not do the busy traffic any favors.

Seriously, the best views.

Even more serious, the freaking people.
BTW, doing this there, we are now forever tied to Universal and Harry Potter. We were thinking about letting the passes go but now, pfft, fat chance at that happening. Plus I’m going to be obligated now to get the LEGO Hogwarts Castle set. You know, for sentimental reasons.
Anyway, I don’t know how we did it, but we did it.

Actually, I know exactly how we did it. We were patient and waited for breaks in the crowd. All the way up until we weren’t patient anymore and almost got into a fight. It’s hard enough waiting for the crowd to break and getting a clear shot. But can you imagine, in that small window of time, trying to get two antsy ass kids to stand there and cooperate and look at the camera and smile and hold the paper up and their wands up just right?! That photo should have won me the Pulitzer.
But I digress. The perfect shot took a while but we got it. And we were really happy with how it came out. Centerstage was the sign that was made and that’s what this post is about. Yeah, finally. I have to keep up with the standards and ramble about random stuff that doesn’t matter to you before I get to what you clicked on this for. I knew deep down there was still a food blogger in me.
How to Make Antique Parchment:
So I guess I could make this into its own recipe card, but I’m not because 1) I’m far too lazy. And 2) It would be overkill and doing it would solely be for comedic purposes as it would probably be funny to see…..
Ugh.

Antique Parchment
Ingredients
- 1 each White Poster Board
- 2 cups Coffee, Brewed and cooled
- .5 cup Instant Coffee
Additional Ingredients
- 1 set Vinyl Lettering of Choice
Instructions
- Cut poster board to size you are trying to make. Preferably not bigger than the pan you're going to be using. This can be a big size like I did for a sign, or smaller, regular sized papers.
- Crumble it to get the desired look. Personally, I rolled it up and squeezed it around a bit and then flattened it out again.
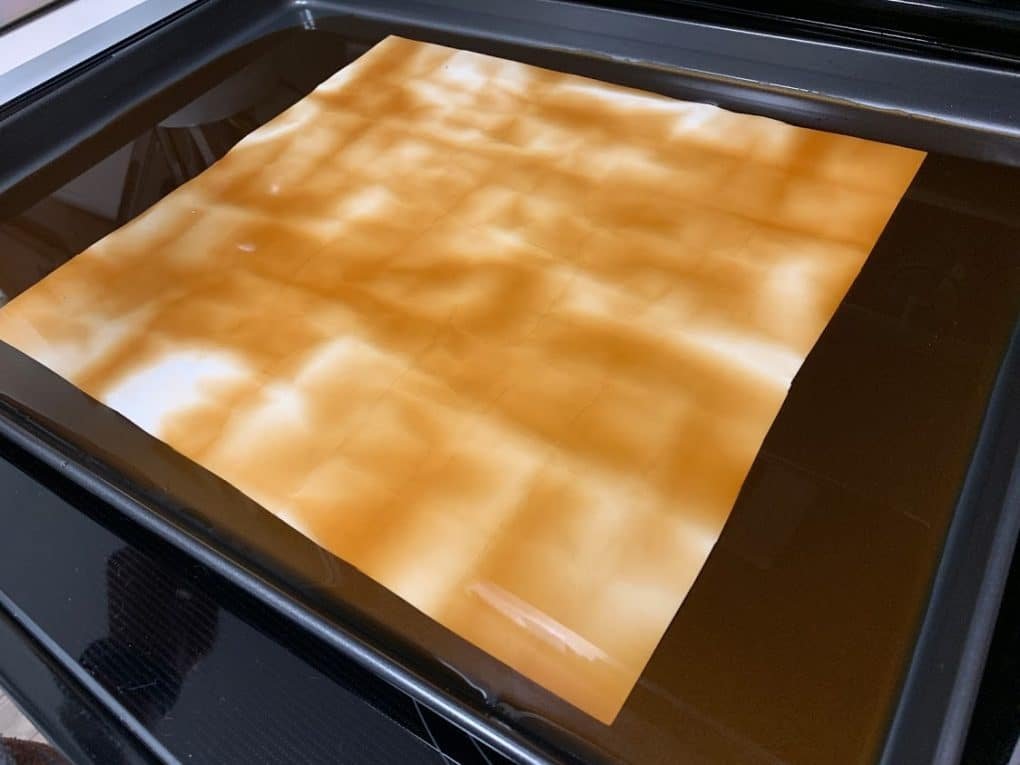
- Place the poster board into a rimmed sheet pan and pour the coffee into it. Enough so that it covers the poster board. Be sure to have some coffee left over in the cup. I'll explain in a later step.
- Let sit for about 2 hours, flipping halfway and making sure poster board remains covered with coffee.
- After 2 hours, turn your oven on to the lowest setting it can go.
- Drain the coffee. It doesn't have to be completely dry, just get most of the coffee out of the pan.
- Please, do NOT drink the coffee you're draining.
- INSTEAD, fix yourself the remaining coffee you have left over. You're welcome.
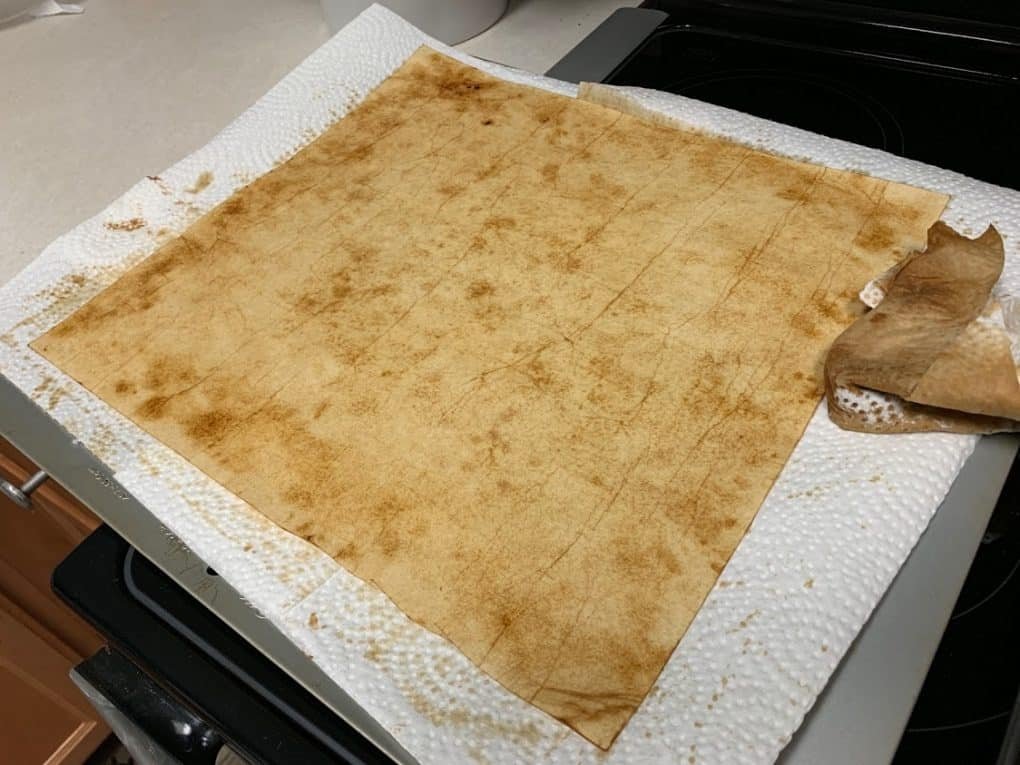
- With the sheet pan drained, take your instant coffee and sprinkle it around the edges of the poster board. After letting it sit for 2 minutes, take a napkin, and blot the excess of the instant coffee off. Do the same for the other side.
- Take the poster board out of the sheet pan and dry the pan with paper towels. I used those same paper towels to line the sheet pan.
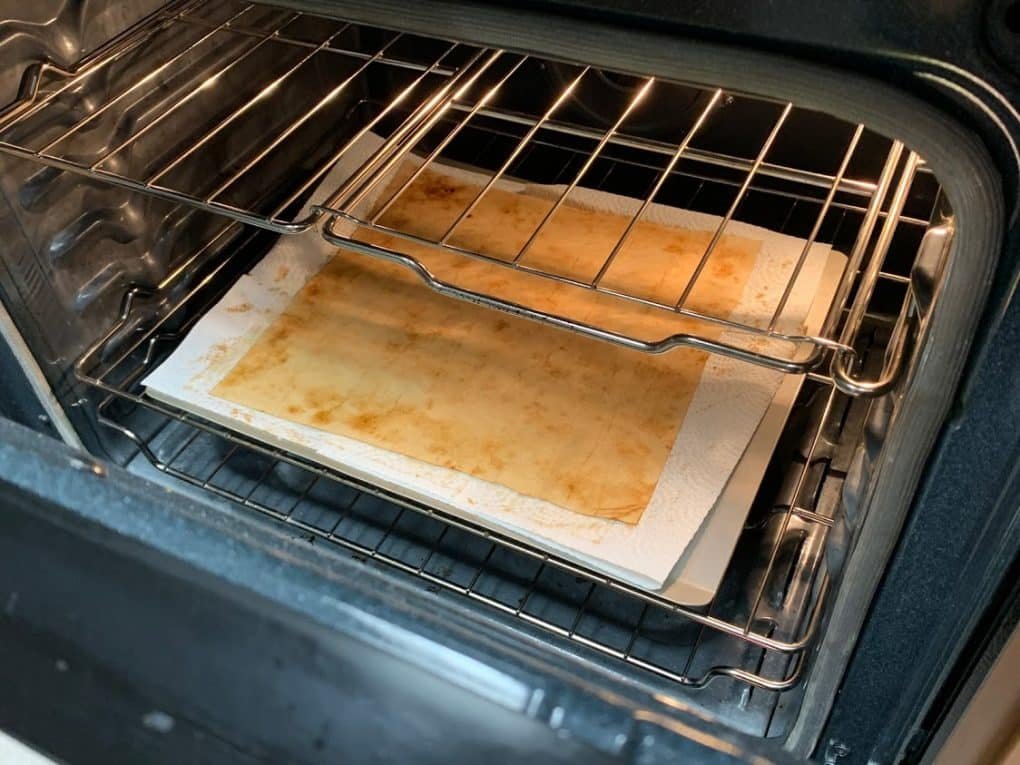
- Place the poster board on the paper towels and put the pan in the oven to dry it out. Flip it every 3 or 4 minutes. You want to keep it in the oven till it's dry, roughly about 10 minutes, depending on numerous factors.
- Once it's out, congratulations, you just made your own parchment!
- When it feels like a normal temperature, go ahead and stick whatever vinyl lettering you have. Or you can also write on it if you have good handwriting unlike me.
Notes
- When cutting your poster board, be sure to not be perfect. Get those edges all rustic looking, as if you just unearthed a Dead Sea Scroll.
- OPTIONAL: When you're done with your project, take a lighter, and burn the edges for that classic parchment look! Because, you know, parchment isn't real parchment unless it's been burnt a few times. It's like the street cred of the stationary world. Kids, be sure to get an adults help for this one.
- Yes, I'm actually talking to you, adult. You know who you are. Don't use this as an excuse to set things on fire, you pyro.
- This is all pretty straight forward with not much room for mess up. It's a fun project for many occasion:
- Wedding invitations
- Birth announcements
- School projects
- Western style Wanted posters
- Royal proclamations
- Pirate treasure maps
- Philosophical scrolls
- Magical spell books
- Declarations of independence
- ...And many more fun uses!
- The shelf life of the parchment will be drastically shortened if you use creamer in the coffee.
- Any coffee can be used. Though Cold brew and Nitro brewed have better effects on parchment making as they are less acidic and less bitter but still deliver the potency and magical properties that regularly brewed coffee can give you.
- No, I'm not serious, you freaking hipster. Yeah, that's right, go cry to your Barista. Maybe they can collect your tears for your next cup of Americano.
OK, I may have had way more fun there than I planned. Moving on to the pictures that I’ll just pretend are not crappy phone pictures because I’m a terrible blogger that doesn’t care about quality anymore:
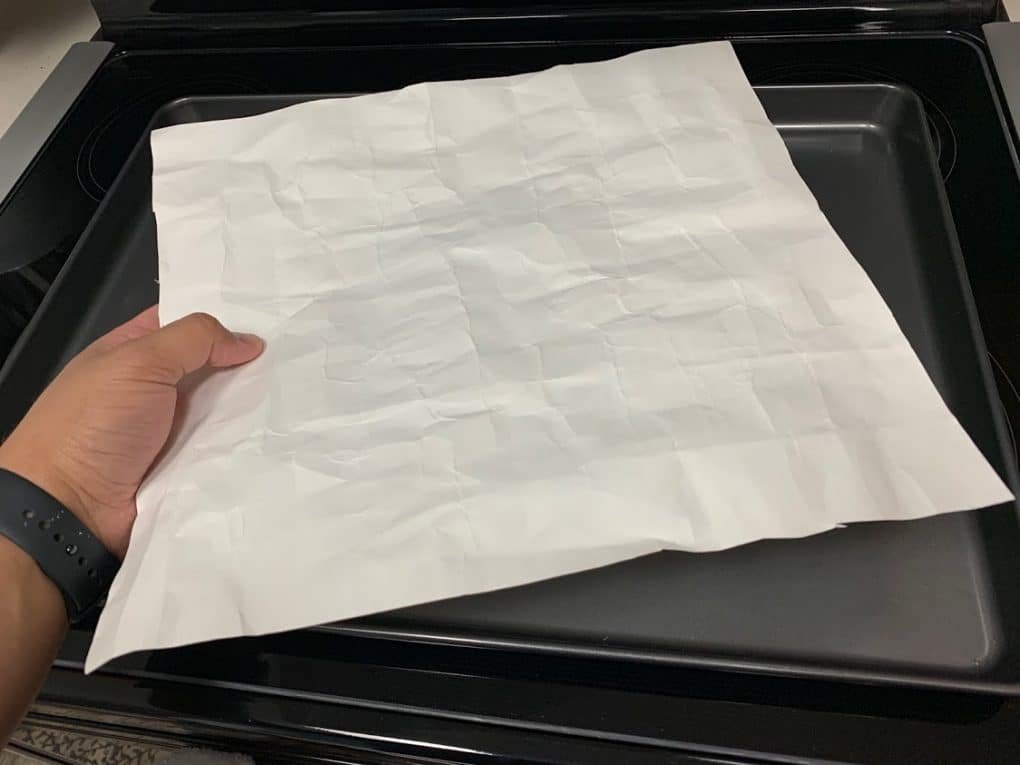
I used poster board because it’s a lot thicker than a regular printer paper which most likely won’t hold up so well. I guess card stock can also be used, but still, cut those edges to be more edgy, savvy?
I made it a big size but that’s because I had a big sheet pan to put it in.
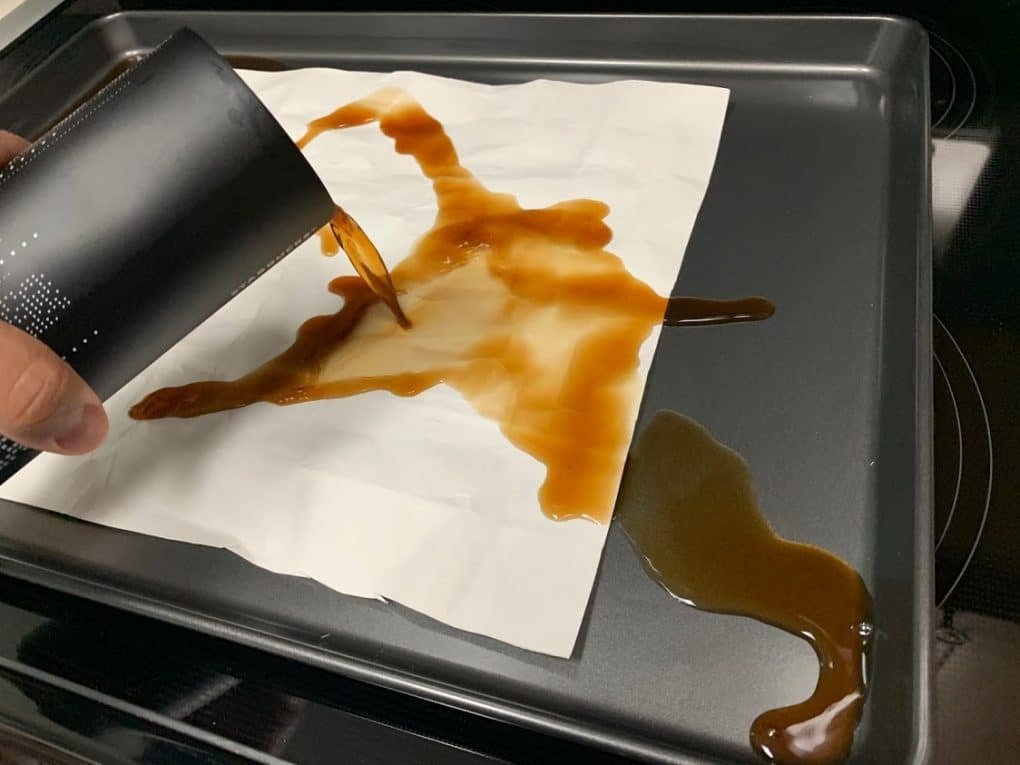
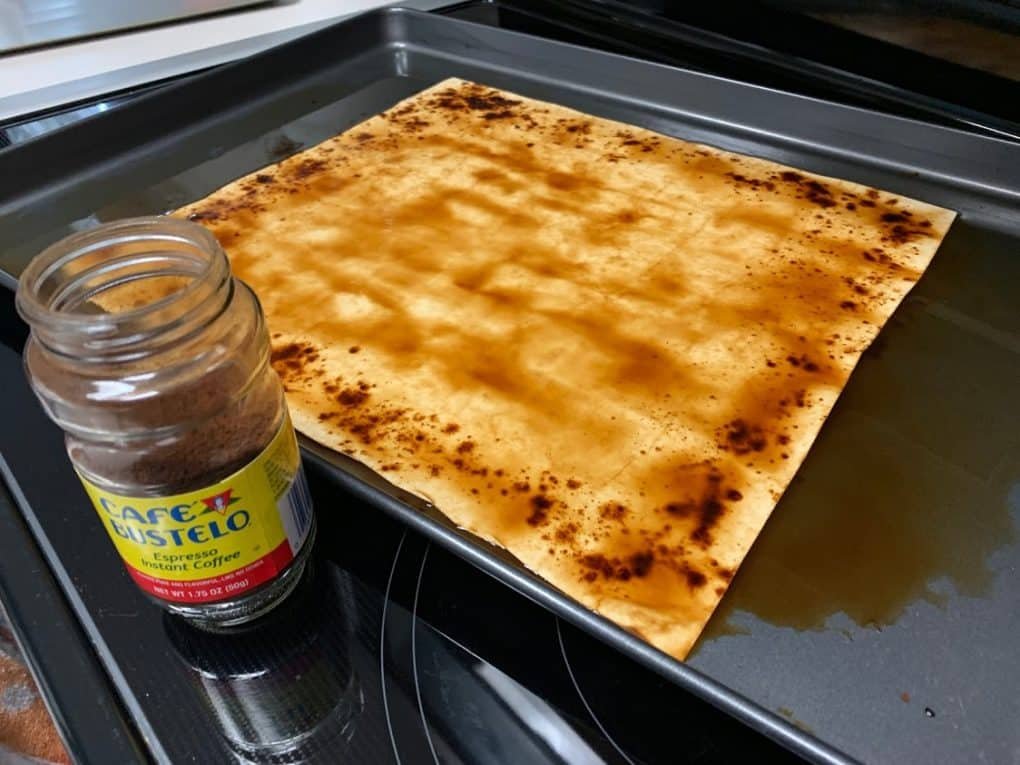
The coffee I used was Cafe Bustelo, my go to brew, in case anyone cares. (You shouldn’t, really. I just need things to say to fill up space.)
Patience is key. The thicker the paper, the longer you have to let it sit. Boldness of coffee might come into play too, but I’m trying to stick to the “type of coffee doesn’t matter” angle I’ve been going with here, so work with me.
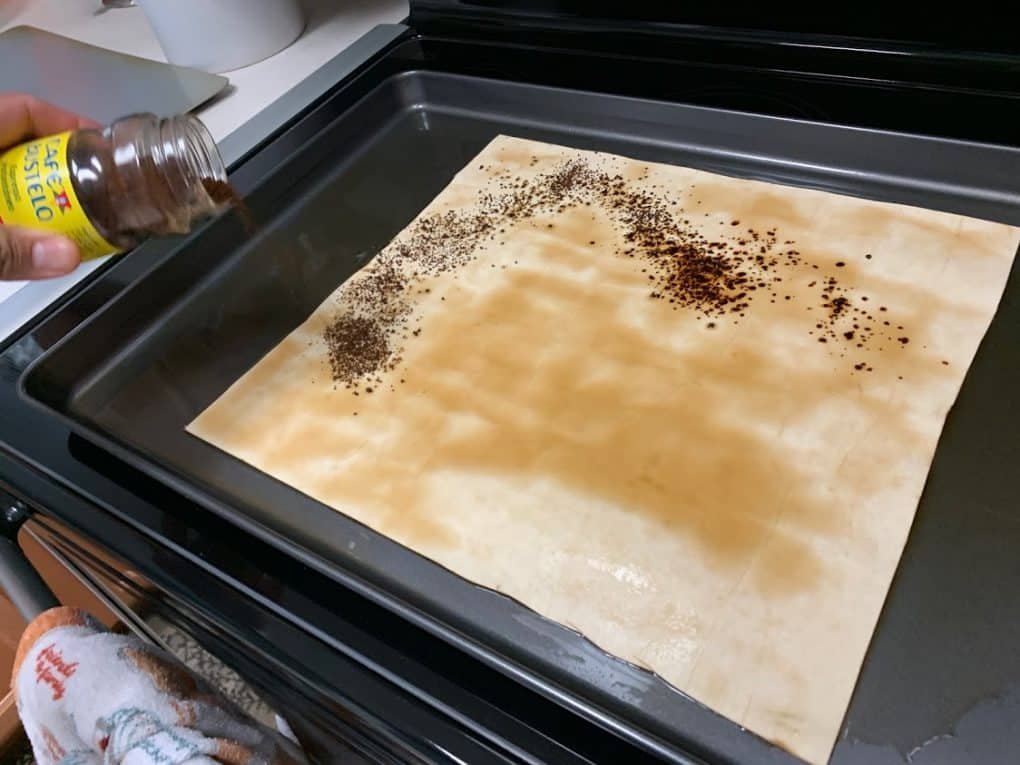
Insider tip/peak behind the curtain: At this point. After draining the coffee, I was ready to call this a failure. Thought my crazy ideas once again lead me astray. So in an attempt to salvage wasted coffee and time, I figured to sprinkle instant Cafe Bustelo (I’m loyal to my brand, yo).
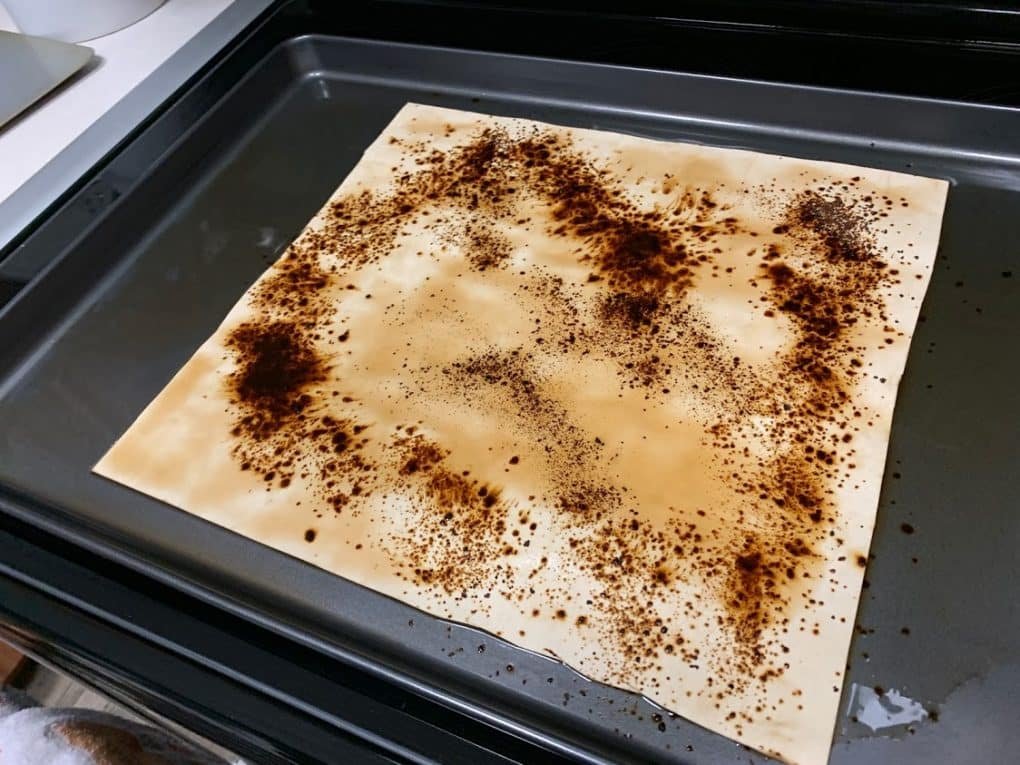
Turns out, I actually did know what I was doing all along, and the instant espresso only added to the awesomeness that was my grand scheme.
And it made me so happy to see because I didn’t have to go to my wife with my head down, full of shame again. INSTEAD, I walked in, head high, chest out, holding parchment in my hands like I was announcing a proclamation directly from the King himself!
But first, it had to dry.
In the oven, for a few minutes.
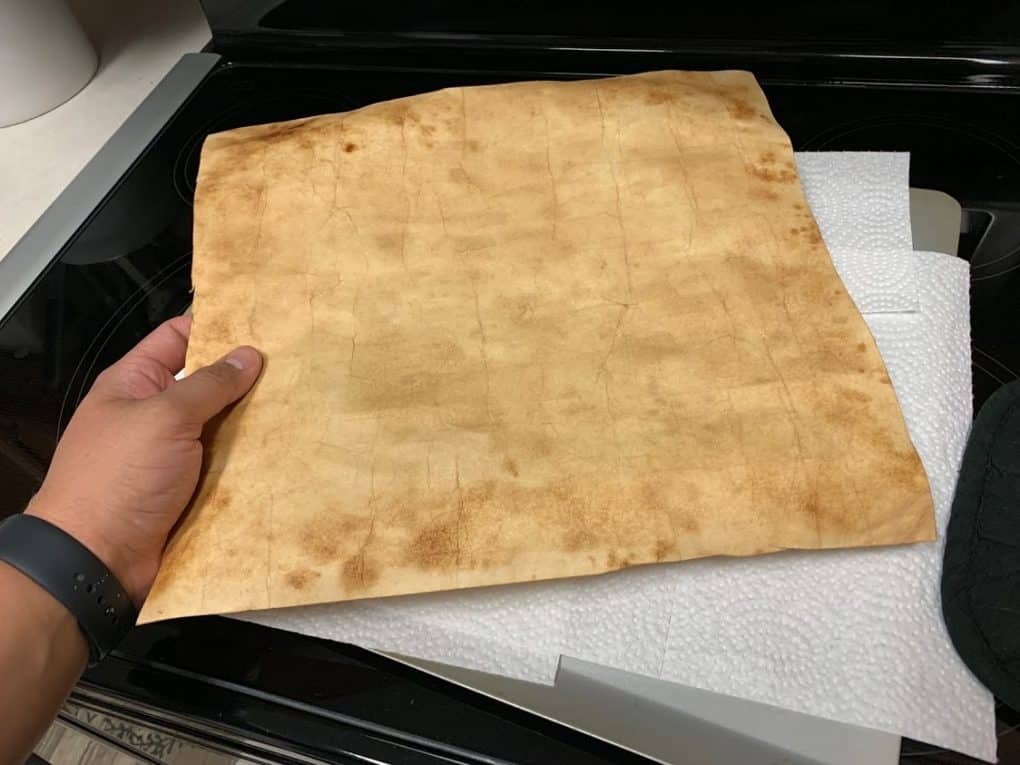
BUT ONCE IT WAS DRIED! Victory was achieved.

Look at the difference!! I’d just like to take this time to publically rub salt in my wife’s wounds. Originally, she got the poster board to go ahead and stick the vinyl lettering onto it and call it a day. COULD YOU IMAGINE?! Lily, our only daughter, Princess to the throne, announced in front of arguably the awesomest castle in the land, using PLAIN, white poster board?! No no no. No child of mine will be so mediocre. That’s what made me set out on this project. And now, Lily is here and she has a professional parchment maker for a father. I’m sure she’ll be proud when she can read and understand this.
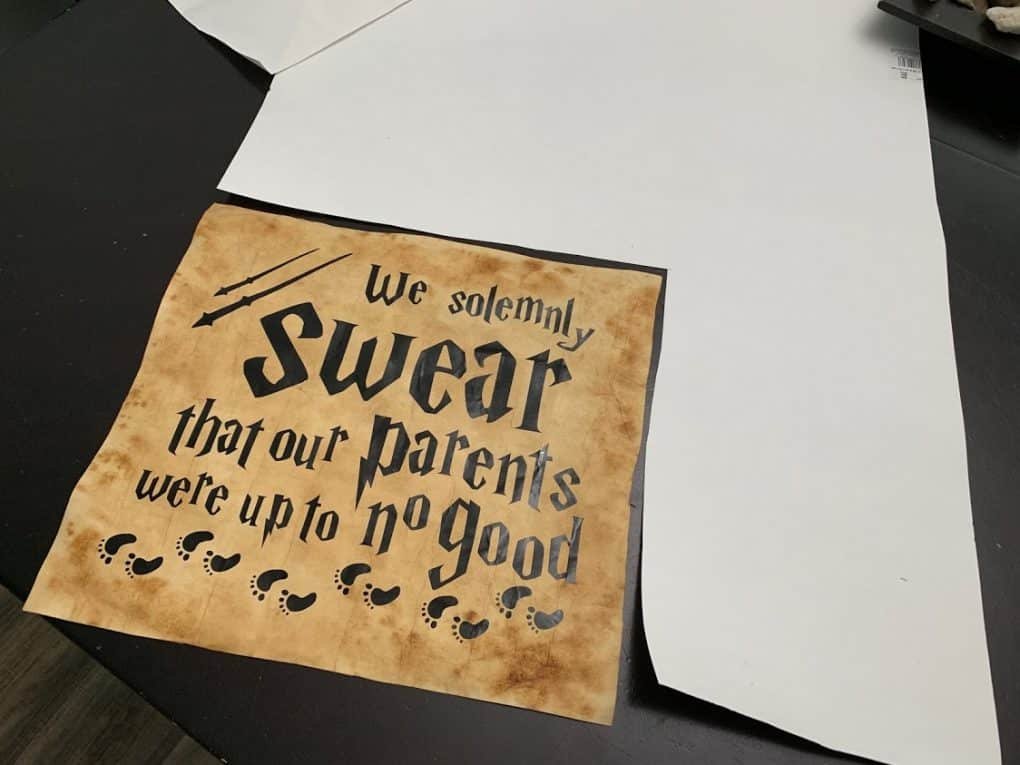
Speaking of the letters, they were made by my sister in NYC, as was the onesie on the top of the post. My mother now also has her own machine to make vinyl decals and shirts, in case someone were.. ahem… in need. If only they had some way to get in contact with…. oh! Look at that! Social media links, right on the top of this page. How convenient.
Ok, I’m done now. This post was fun and I hope we all learned how to make our own antique parchment. Now, go forth, my faithful followers, and litter your streets with wanted posters, royal decrees, and all sorts of other ridiculous things you would do with this old looking paper.