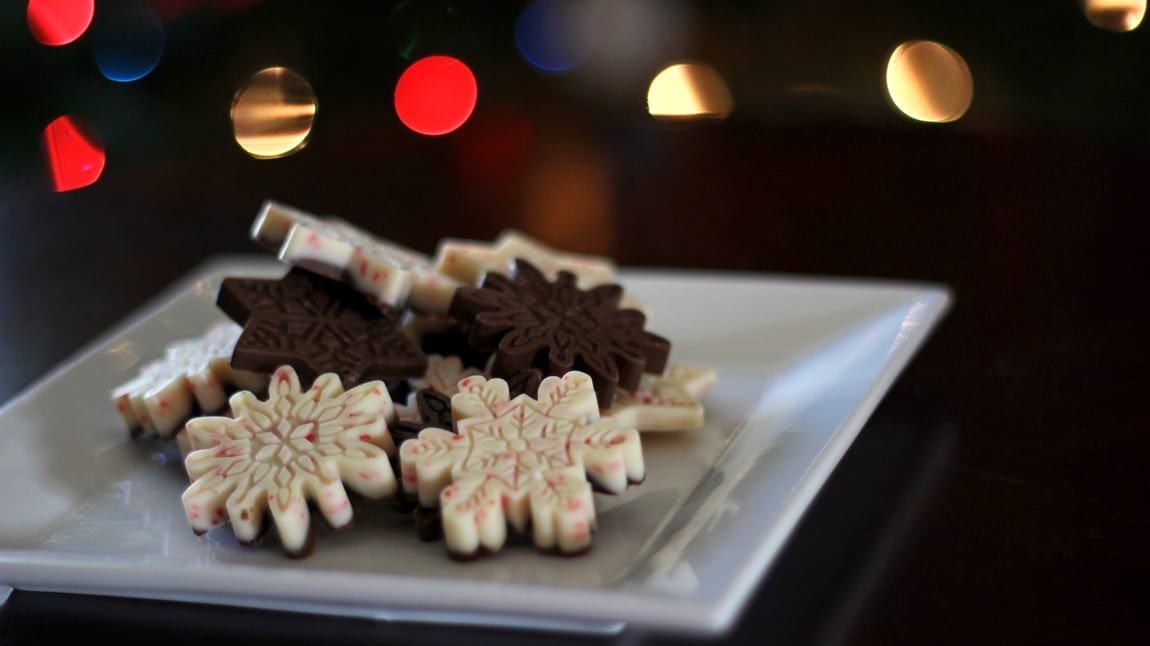
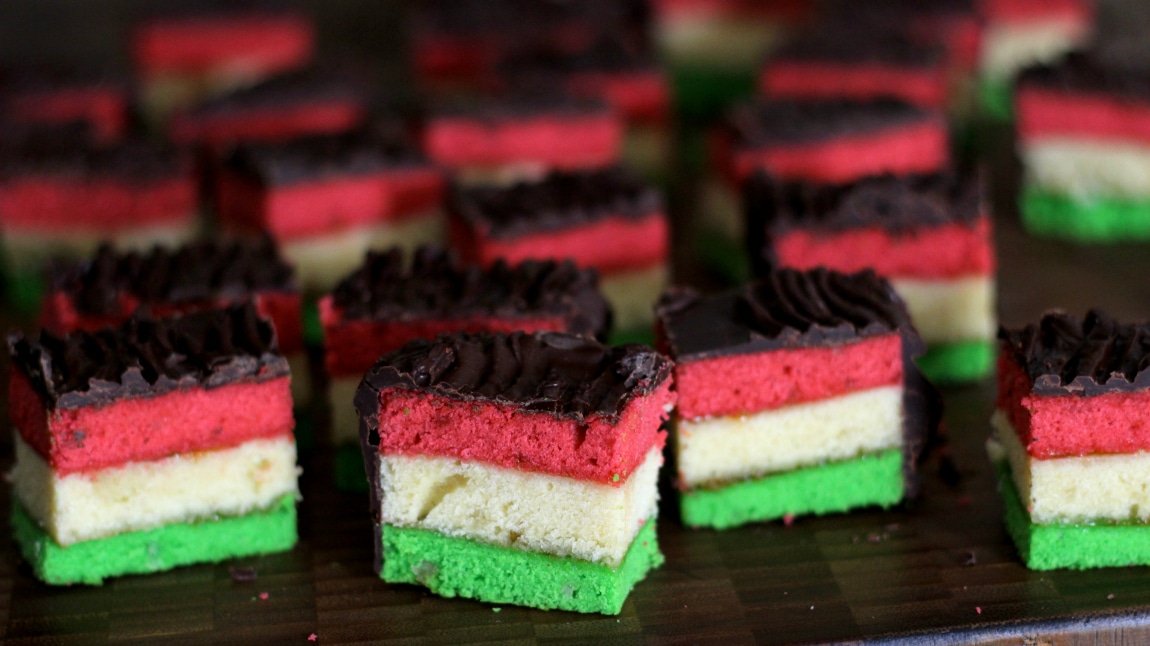
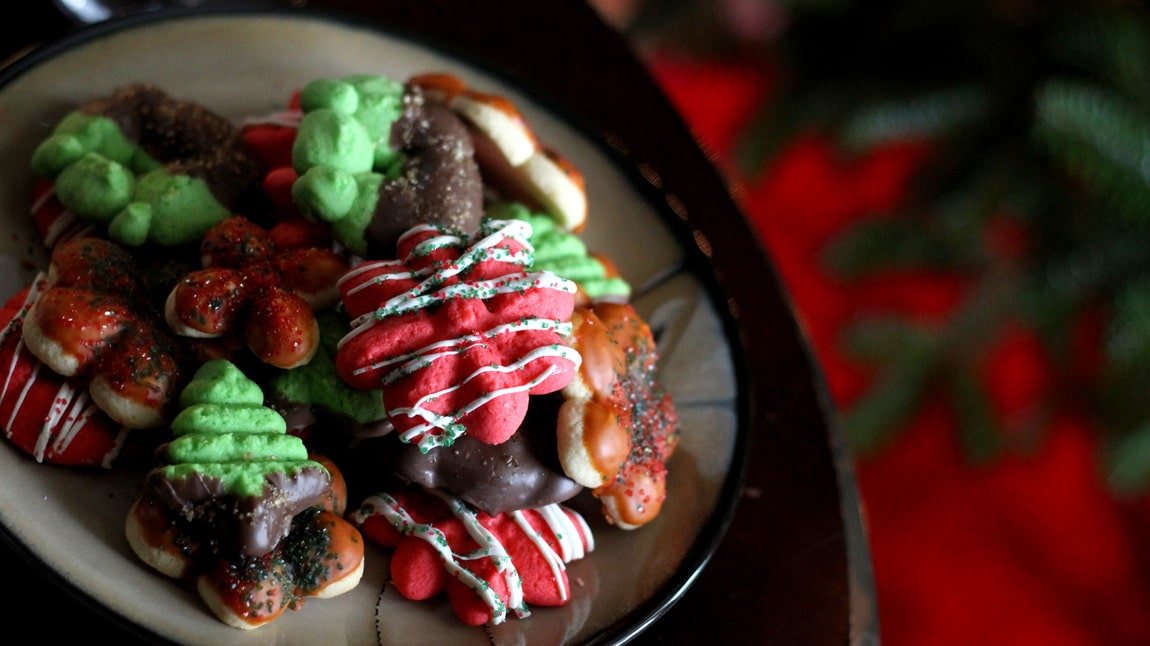
If there’s one thing you gotta love about Christmas time, it’s the joy you get to share with loved ones. Nah, who am I kidding, it’s the cookies. You love the cookies. It’s ok, don’t be ashamed, you could admit it. Trust me, you will …Read More….
Happy holidays!! Just to be clear, I’m not the politically correct type to tell everyone happy holidays. No offense to anyone, but I’ll Merry Christmas your ears till the elves come home. But since we’re in the holiday season and it’s not Christmas yet, that’s how …Read More….
I love doughnuts. Like, looooooove em. There aren’t many things I wouldn’t do for a doughnut. Seriously, when I tell you I’d inject them into my veins, I hope you believe me. The science is there, it’s been done before by great men…
Even with my love for them, I’ve gone so many years on this site and I never made any. What’s up with that?! Chalk up another one for unexplainable laziness.
But being lazy isn’t a reason anymore! Because Wilton and their awesome selves are now the primary contributor to my new doughnut habit! No more “but the doughnut shop is so far, and so expensive..” No more “You’ve already bought 2 dozen, you don’t need any more.” Nope, now all I have to do is pull this pan out of the cabinet and in about 20 mins I could be getting my Homer Simpson on.
Ha, speaking of the doughnut shop, it reminded me of a story. One night, the wife and I were wanting doughnuts. So we went out and got to the place just before closing. The nonchalant workers who were probably tired of taking home mountains and mountains of doughnuts were like “you sure you only want a dozen?” And we were like “yeeeeah”. So she was all “I think you guys want more than that..” And the next thing we knew, we were paying for 12, but walked out with like 60! They threw away extra doughnuts at the end of the night and we were the last ones there so they unloaded on us. It was… *wipes tear*…. It was one of the greatest nights of my life. SO many doughnuts. Sooooo many. I was like Scrooge McDuck in a doughnut bin. We were making it rain doughnuts, it was glorious.
Anyway, back to now. Halloween just passed us by and Thanksgiving is right on its tail. These doughnuts will be PERFECT to greet whatever guests are gracing your presence come turkey day. The flavors just scream fall and are just dying for a chilly day and a nice cup of coffee to accompany them.
You’re going to need a doughnut pan to make doughnuts…
This recipe makes about 2 pans of doughnuts.
If the brown sugar mixture seems runny, add a bit more sugar till it’s the consistency below.
You can skip the brown sugar/pecan topping. It’ll still be a great doughnut. But you’ll seriously be missing out.
The sticky top is not only bringing a ton of awesomeness, it’s also making the doughnut nice and moist.
In case it isn’t clear – don’t skip the sticky topping.
If you’re not a fan of nuts, you can totally omit them and just use the brown sugar mixture. You’ll get the moist doughnuts with no nuts.
The icing has a nice strong salted caramel flavor. If you want to adjust it, put 3 drops and see if it’s to your liking before putting the whole 5.
I didn’t want to pump every doughnut full of epicness. So I melted some chocolate chips and drizzled them over doughnuts I didn’t bake with the sticky top. They’re equally great in their own way, and perfect for kids you don’t want to load up with sugar.
If you don’t want to do chocolate you could just drizzle with the salted caramel icing, or you could melt whatever else you want and put it on there. Basically, the choice is yours.
Alright so let’s get rollin’.
Oven is at 350, but first, you’re making sticky goodness.
Put the brown sugar, butter, and milk in a pan and cook it on medium/low heat until it’s nice and melted. It should be thicker rather than thinner, so when you run your spoon through it in the pan you should be able to see the trail for a bit before it settles back.
Now that it’s ready, take it off the heat and start working on the batter. I hope you’re ready for this complicated step. If you’re not already, you should sit down…
Take everything for the doughnut batter except for the flour, and mix it up in a mixer. Once it’s together and you scraped the sides and bottom, add the flour and slowly mix until it’s just incorporated. Aaaaaaaaaand that’s it. Now the fun part!
Give your doughnut pan a little spray and start loading it up. If you’re just doing regular doughnuts without the sticky top, just spoon in some batter until it’s just below the top. But if you’re doing the sticky top, you have to put that in first.
So spoon in the brown sugar mixture. Just enough to layer the bottom. You don’t want a pool of it! So maybe 1.5 – 2 tablespoons should do it. Next, drop some chopped pecans in there. I’m a sucker for nuts so don’t be shy with them.
Next, spoon your batter on top of the nuts. Same deal, you want to fill it up to just below the top. Smooth it out too, as best you can.
When you have all the doughnuts filled up, throw the pan in the oven and bake it for about 15 minutes. You’ll feel them springy to the touch and they’ll look nice and plump. The sugar will be bubbling out but that just means they’re awesome.
While the doughnuts are in the oven, you’ll have plenty of time to get your icing going! It’s another simple thing, just putting everything in a bowl and giving it a little whisk till it’s smooth.You’re looking for a consistency that can coat the spoon, but not something crazy thick. You’re meant to have it glaze over the doughnut to drench/coat it, not sit on top of it.
And I’m telling you, the salted caramel flavor is so perfect. I absolutely love the Treatology Flavor System. So many possibilities, it’s ridiculous. And even if you’re just using one flavor like I am here it’s so great.
So once the doughnuts are out, use a fork to get in on the sides to help you get them out.
It’ll be simple from there. Once they’re loose and almost out you could just pull them with your hands.
If there are any pecans in the pan (which there probably will be), just scoop them up and spread them on the bare spots on the doughnut.
When you take them out of the pan, put them on a cooling rack. Once all your doughnuts are ready on the rack, you can get to finishing them off!
If you’re doing plain doughnuts with chocolate, go ahead and melt your chocolate and get it in a bag. Cut the tip off and just start drizzling. This could be done on a cooling rack or parchment paper.
For the sticky topped doughnuts, you want to keep them on a cooling rack. Go ahead and get your icing ready and use a small measuring cup to pour it over each doughnut.
After that, you’re pretty much done!
Just need to play the waiting game till the icing is dry.
And as you could imagine, waiting for these will probably be the hardest part of the whole thing.
But I promise, the wait will be worth it! Remember how moist I told you they were? I don’t think you’ll fully understand until one is melting in your mouth.
So hopefully you get to try it soon!
And if you don’t, it’s ok…. No, actually, it’s not ok, you need them.
If you’re interested in any more doughnut love from the Wilton Treat Team, Julianne from Beyond Frosting made some awesome Apple Cider Donuts you should check out!
So yeah, we’re at the end of October. If you haven’t caught on, I usually start my blog posts with a reminder of how fast time flies. It’s not my fault! Whenever I start writing something, the first thing I do is look at the date. …Read More….
October is basically over! Isn’t that just plain ol nuts?! I mean, we’re a whole two months from the end of the year! It’s madness. Even more madness? This is a post about something that happened waaaaaaaaaaaay back in March! Hahaha, yeah, I know! What …Read More….
I know most of you don’t know me. I mean, you know a lot about me, but not characteristic stuff. Well here’s something that not many people know – when I’m eating breakfast, I’m a sandwicher. If you or someone you love is also a sandwicher, then you know what it is. If you don’t know anyone like that, it basically means whatever I’m having, 9 times out of 10, I’m going to make it into a sandwich. It’s a blessing and a curse, really. A blessing because it tastes so freaking good most of the time, and a curse because whenever I’m piling something on, I look up to see my wife’s judgmental eyes staring at me. As if I’m a lion on the plains of Africa, about to dig into a freshly caught chunk of bacon.
Anyway, my undeniable love for breakfast sandwiches is about to shine through. Because yes, thanks to Wilton, making a breakfast sandwich just got a whole lot easier!
I know, it seems like all I’m ever doing now are Wilton posts. To be honest, I haven’t really been in the kitchen as much as I used to. I want to say the summer vacation Seb was on from pre-k really messed me up and cranked my laziness up to 11. But he just started kindergarten! So even though it’s unnaturally quiet around the house, I’ll hopefully be able to start working on the blog again.
And here we are! Wilton surprised the hash browns out of me when they said they were sending me these two pans. First off, they’re for breakfast! Not cakes, not cookies, not a holiday mold… Breakfast! In case it wasn’t clear, I love breakfast?! Not only is it the most important meal of the day, it’s also the tastiest (don’t argue with me over that, you’ll lose)! Secondly, it’s not only for breakfast… it’s for breakfast SANDWICHES! That’s it, I’m done. Drop the mic, second round knockout, grand freaking slam.
I knew that once I got back into the kitchen, this is the first thing I was going to do. And it totally was.
As if THAT wasn’t enough, there’s a pan JUST for bacon! I mean, if anything in this world deserved it’s own pan, it’s freaking bacon!
Yeah, you could use it for other stuff. But we all know what it’s really for. It’s ok, Wilton. I caught what you threw. I picked up what you put down. The eagle has left the nest and is headed to Baconville. WINK WINK.
At first, my plan was to make some sort of english muffin for it. Now I don’t know if you’re keen on how to make english muffins (it’s pretty easy), but doing them in a pan like this would’ve been a challenge. So after thinking about it for a few days, I figured the best thing you could utilize this pan for would be pancakes. It’s basically what it was designed for. I’m sure whoever it was that developed this pan, created it for the sole purpose of making breakfast sandwiches with pancakes. And I surely hope that person is considered for the next Nobel Peace Prize
I didn’t originally want to go with pancakes though. I thought the sandwich going to be too much like the one at that fast food joint with the golden arches and the clever names for everything. But then I got to thinking, like I do. And if you’re making these at home, that makes them about 468 times better than that other place. You know what you’re eating, there’s no additives and preservatives that could make it edible for the next 200 years, not to mention it’ll be hella cheaper than stopping over there every morning. So yeah, take that, fast food!
After I decided it was going to be pancakes, the rest of the questions started flowing through my head. Do I put syrup in the pancake batter? Will cheddar cheese in the eggs be ok with the pancakes? Is it worth the time to use that pan for bacon? …The answer to all these questions is “[expletive] yeah!”
Alright, enough beating around the bush, let’s get the breakfast train moving.
Salt and Pepper
Cheddar Cheese, shredded (optional)
Maple Syrup (optional)
Notes:
The Panwich. Like that? Yeah you do.
The Breakfast Sandwich Pan and the Oven Griddle Pan from Wilton are both needed for this. But, they won’t be available in stores or on Wilton.com till around October.
You can use my pancake recipe, which I generously provided the link for. You’re welcome!
The pancake recipe can make enough for 2 pans. That’s 6 sandwiches total. Almost a full week of morning happiness.
To store: Since you’re probably not going to eat 6 sandwiches in one sitting, you can do what I did – Try your hardest. If you still can’t, then you can store everything separately in baggies – bacon in one, eggs in another, etc. – and keep them in the fridge.
To reheat: Just make your sandwich, wrap it up in a napkin, and put it in the microwave for 1 minute. This made mine perfect, but all microwaves vary, so if it doesn’t feel as warmed up for you just pop it in for a few seconds more.
I put cheddar in my eggs, but that can be skipped. As can the maple syrup in the pancakes. You know, if you’re not one for great things.
Speaking of which, the syrup does not effect the top of the pancake, but it does sink to the bottom when baked. It leads to the bottom layer being a bit sticky, which is terrible…
…If you leave that layer on the outside of your sandwich. See what I’m saying? I took pictures of my sandwich with the sticky side down (where you would be holding it) because it was better for picture taking. But when you’re making your sandwich, flip it, and have the sticky part on the inside of the sandwich where.. get this… you’ll never touch it!
I experimented. With the eggs, I whipped the yolk with a fork but left one whole to see if I could get a runny egg in my sandwich because, YUM. But after baking, it just cooked all the way through anyway. So it’s better to hit the yolk with a fork and spread it out so you get more yolk flavor throughout the whole egg rather than just in one spot.
You can take both the sandwich pan and the bacon pan and fit them on the same rack in the oven, but I like cooking my bacon at 400°F, while the sandwiches cook at 350°. So best to do the bacon first.
No. Wait. Do the bacon second. If you do it first you’ll be like me and wind up eating half your bacon before the sandwiches come out of the freaking oven.
Alright, let’s get crackin’.
It’s easy enough really. Hardest part is probably going to be making the pancake batter, and that in itself is just putting the ingredients in a bowl and whisking it about. Seriously, this isn’t rocket science. It’s barely 1st grade reading level.
First thing you want to do is turn on your oven to 350° and get the batter done for the pancakes. The simple and ultra tasty pancakes you can conveniently find right here on this awesome blog I found is the recipe I used. It’s really just putting everything in the bowl and mixing. Fo reals.
Next, spray the pan with non-stick, and get yourself something to scoop the batter into the pan. I used a cookie scooper. Fill up the cavity about half way, not to the top. Make sure you shake it around to let it settle.
When you have all the batter in the pan, put a few drops of syrup in each one. Don’t load it up, don’t go crazy. A few drops is enough to give you a good flavor. I’d say 3-4 drops around the pancake. If you want to stir it around it’s your call. The flavor comes through either way. Trust me, I’ve tested it!
Your pancakes are ready, now, crack one egg into each of the center cavities.
When in there, hit the yolk with a fork and stir it around gently till the yolk is stretched about the egg. Don’t sit there and scramble it, just enough to break the yolk.
Sprinkle with salt, fresh cracked pepper, and a pinch of shredded cheddar if you’re going that route.
With the pan full, pop it into the oven for about 12 minutes. When you see a slight brown edge around the pancakes and the eggs are firm it’s ready.
That’s really it. Remove everything from the pan, put it aside, clean it out and repeat everything. Like I said, I had just enough batter for 2 pans worth so it’ll give you 6 sandwiches.
Next, crank the oven up to 400° and get the bacon in there for about 15 minutes or until it’s cooked to your liking. I like mine charred. In case you were wondering. There’s seriously nothing to this pan, just put the bacon on it and pop it in the oven.
I’ve never used one of these special bacon pans before, but I absolutely loved it. I always put my bacon in the oven because it’s easier than tending to it in a pan. I’m also a creature of habit and I always get myself a sheet tray, line it with foil, and fill it up with bacon.
Of course, when it’s done I have to fish the bacon out from the sea of grease that rendered. And I’ll be honest with you. It’s cool and hip and manly man to be all like “Yeah! Bacon grease! Let me dip my bread in it, or use it to fry my eggs, or rub it all over my body before hitting the beach.” I mean, I’m sure that’ll smell absolutely fantastic, but no. Just no.
That grease can’t be good for you in the long run. I’m a huge lover and admirer of all things bacon, but as soon as it’s done cooking, I’m patting and trying my best to soak up all the excess grease off the bacon with paper towels.
This pan is designed to help with that. The raised platform you put the bacon on is surrounded by a reservoir where the grease pools and creates a sort of greasy mote, if you will, surrounding the island of bacon that you just constructed.
The Island of Bacon. Set me up on a cruise ship to that chunk of paradise, right?!
Anyway, you could see all that grease that your bacon isn’t floating in or soaking up. Yeah, the strips still have some grease to them, but not nearly as much as they would’ve had if they were in a regular pan.
Like these that I so happen to cook right beside the others. You can see the difference and they were in for the same amount of time. The sheet tray didn’t even fully cook where as the bacon on the Wilton pan was nice and crispy.
Still not convinced?
Same amount of time, same rack in the oven. I’m telling you right now, if I’m making bacon, it’s going to be on this pan.
Act now, and we’ll double your order!
Jkjk, I couldn’t resist. I know I’m sounding like an infomercial but I love how well it works. Only thing I would change is the size. But that can easily be fixed by just getting another one which I plan on doing. They’ll fit side by side in the oven so c’mon. No brainer.
Oh! And cleanup! I haaaaaaaaaaaate having to clean up after cooking or baking. And I hate the ridges in grill pans even more. But these are spaced out enough, and the grease trench is wide enough to make cleaning fairly simple. I just let it soak for a bit in hot soapy water and it came out clean as a whistle a few short scrubs later.
But back to the sandwich! You’re… making a sandwich. Not too hard, I’m sure you don’t need my instruction on this.
Just pile it all on. An egg, some bacon, and top it with another pancake. And boom, it magically turns into a pile of happiness.
Remember, it’s a cinch to reheat it too. So when you pull it out of the fridge, make your sandwich, wrap it up in a napkin, and put it in the microwave for a minute.
Oh, and don’t follow my pictures if you plan on stretching out your bacon for all your sandwiches. I may have put a taaaaaaaaad more than I’d recommend if you want bacon throughout the week. Do what I say, don’t do what I do.
And that be that! I really do hope this gives you some confidence and inspiration to stop making a morning visit to the cashier at the drive-thru window. Honestly, you can’t go wrong with this. Simple, quick, tasty. It’s ok, you could thank me after coffee.
Here we are again! Like it or not, we are quickly approaching the end of summer. I know, it feels like it just started, but what can you do? Personally, I cannot wait to start enjoying that fresh, crisp fall air. It’s just the way …Read More….
Mama Said Knock You Out Happy mothers day! Wait, what? I’m early?! Whoa, that’s a first! But it’s for good reason. A couple of months ago, Wilton asked if I had anything inspirational to share about my mom. Without even thinking about it, about a …Read More….
Well, let’s not draw it out. A lot went on and we don’t need filler so I’ll get to it.
As you may know, I’m an ambassador for Wilton. As a member of their Sweet Treat Team I’m honored to receive products of theirs to try out and tell you about. It’s an insanely simple relationship we have since I always used their stuff anyway, so when they asked me to be a part of their team I was star struck to say the least. Fast forward to now and I’m still taken aback by their awesomeness.
Because a few weeks ago, on April 23rd and 24th, they hosted the 2015 Wilton Sweet-Up! Since their first one in 2010, they’ve only had 3 others – 2011, then 2014, and this year, 2015. During these awesome events, they’ve always managed to impress those they let walk through their doors. This year, those of us from the Sweet Treat Team who were able to make it shared the experience with a number of other insanely talented and cool people from all over the U.S.
So what exactly goes down at the Sweet-Up? Lots!
Imagine it as a meet up where people get together to talk about a bunch of sweet stuff. So really, not only is it a great event, but it’s also perfectly named!
Lots of things get revealed and are talked about. Like the awesome Display Your Way Cake Stand that can be customized to fit the theme of whatever you’re baking for.
Or the magical Color Swirl Decorating Kit that gives you the mystical ability of effortlessly piping 3 different colored icings at once!
Aside from reveals of new products, every Sweet-Up consists of a few hours where the top trends for that year are talked about, then a fun filled list of activities and demonstrations take place the following day. This year, a bunch of trends were talked about. What are a few? Well I’m glad you asked!
A Merveilleux was the first thing that was listed. It’s a French pastry that’s making its way to the states and consists of meringue cookies layered and covered with whipped cream then rolled around various toppings. The result is almost ice cream like the way the moisture from the whipped cream takes most of the texture away from the meringues, leaving you with this light and airy treat that you won’t be able to keep your spoon away from. Trust me, they let us try a bit, it’s the bee’s knees.
If you’re really curious, Wilton has a really detailed video you could check out!
Smokey flavors meeting sweet desserts is something else to look out for. This is one of the trends on the list that caught my attention because there’s a ton of different ways you can take an ordinary dessert and make it stand out by incorporating some sort of smokiness to it. There’s a joke here about brownies but ain’t nobody got time for that. Next trend!
Using watercolor techniques on fondantis another one I dug. It just makes so much sense, and the end product would be such a unique and elegant looking cake. And you’re essentially doing watercolors on a cake. I mean, 5 year olds play with watercolors! How hard can it be to make a good looking cake?! (I can almost feel future-me slapping present-me right now)
Colorful confectionery is the last one I’ll talk about since there’s more I want to cover. It’s a trend that I’ve already seen hit my grocery store’s bakery. The use of color combinations you wouldn’t have normally used, creating unique and eye catching treats that look like they came off the Lost Boys’ dinner table.
Did you catch that, kids? 90’s movie reference. Educate yourself.
And that leads me to a few more things that were introduced for the first time: The Color Right Performance Color System and the Treatology Flavor System. Those are two products you seriously need to look out for. They’re cooler than candy melts… and you know how much I love candy melts!
If you ever imagined yourself making a cake that had over a hundred different colors on it and in it, first of all… what in the blue heck is wrong with you?!? Second, all your wishes and dreams are about to come true, crazyhead.
The Color System is a set of 8 concentrated colors that can be used alone or combined to create an insane amount of colors. Not only that, you can easily create the same color, perfectly, every time. Want an idea of the kinds of colors you can create? Then there just so happens to be a handy dandy chart right here.
The Treatology Flavor System works the same way, but it’s totally different (don’t stop me now, I’m on a roll)! It’s 8 small bottles of concentrated flavors for you to use in anything you’re making. Cakes, icings, drinks, whatever. These things pack a punch too, let me tell ya. Much stronger than regular extracts, the flavors you’ll get are big and should be used to showcase.
I was lucky enough to get my hands on both these systems back in March. I played with both a bit and I’m insanely impressed with their potential. Can’t wait to hear and see all the crazy combinations of flavors and colors people come up with.
We got some rest after talking trends and started the next day bright and early with Amber Spiegel, or SweetAmbs as you may know her. She was teaching us the art of cookie decorating, and it was a blast!
It had been a while since I was in a learning environment like that so it was fun. She showed us a wet-on-wet technique using royal icing and made it look all too easy.
We had everything we would need right in front of us and got to try out what she was demonstrating. We got to use the Color Right System to mix up our royal icing and I managed to get some of my favorite colors whipped up. Too bad they didn’t make my cookies look any better.
It was such a cool learning environment though, with her and her assistant there walking around, making sure we were on the right track.
I mean, she could’ve had an army of assistants and I wouldn’t have come anywhere near her skills…
But it sure as heck inspired me to keep on trying. If there’s one thing I took away from the Sweet-Up, it’s a strong urge to practice and learn more about cookie decorating.
After that first workshop, we took a tour of the Trend Room. Imagine a large room with numerous work stations, each one working on something different. We were told no one who toured it before was ever allowed to take pictures in there, but this was the first time it was permitted! I felt extremely privileged, but at the same time, I still held back from photographing Eric Erwin, Wilton Executive Vice President/CMO, proudly showing off awesome looking sketches of ideas they were working on. But I didn’t hold back from other stuff! There was A LOT going on despite there only being 5 or 6 designers working on projects in there.
From where I was standing I noticed a sweet new technique on working with fondant. Something so simple that you have to wonder why you didn’t think of it, yet when we spoke to the designer, she listed all the different ways they tried to execute the effect before they finally found the way that worked.
Conversations like is what I love about things like this. It really opens your eyes and makes you realize things don’t just happen. They don’t mystically appear on store shelves and pictures on websites. People work on projects for months at a time before it sees the light of day, and being able to have a peak at that process had me geeking out hard.
Behind me, another designer was working on snowflakes, while behind them, someone else appeared to be researching on their station’s computer. Like I said, it didn’t seem very busy in there, but there was a lot going on.
I walked around a bit and talked to another designer. She was working on stuff for Thanksgiving. I looked confused but she explained how they have to stay far ahead of holidays and times. It’s a long process to get an idea from paper to shelves so they have to stay on top of it. I thought her working on Thanksgiving was nuts, but as it turns out, the lady with the snowflakes on the other side of the room was working on Christmas. So crazy!
While talking to her I couldn’t help but notice organized chaos everywhere. Work stations, tables, carts, just everything everywhere. And I freaking loved it. I told her and I think she felt like I was being negative. But I had to quickly reassure her that I loved seeing the craziness.
All sorts of utensils and tools and papers and products and tips… Holy piper’s paradise, Batman, the amount of decorating tips everywhere.
It was all proof showing how this company that many may just think is a machine pumping out products, was being ran and maintained by humans. Extremely talented and cool humans.
I turned around and noticed everyone I was touring with was gone. I quickly thought I was part of some hidden camera show, but then I was told “oh, they’re just in the cake vault.” The cake vault?! So I go to see and sure enough, it was a cake vault!
A decent sized room filled to the brim with all sorts of goodies. Cakes, cupcakes, treats, cake pops…
It was seriously like I stood in front of the Room of Requirement, asked for a room full of every cake imaginable, and boom, the door opens to the cake vault in Wilton HQ.
The decorations and such can be anything from royal icing to fondant, but sadly, there are no real cakes or treats in the cake vault. If it was a shaped cake, then it was a sugar mold. If it was a regular round or square cake, it’s styrofoam. Hello, I’m Los, spoiler of fantasies and crusher of dreams.
But still though, it’s insanely impressive and easy to spend a few hours looking at everything. I didn’t want to leave just because I wanted to see the crazy stuff I would find.
But the day had to go on! After the tour we had an impressive boxed lunch before heading to The Wilton School for Cake Decorating.
There, we met up with Beth Somers and Elizabeth Nelson and we had fun with boozy baking!
I’d get into more details but there was Kahlua involved and you know me and coffee liqueur. Hahaha, jk. Let me take that back before what I accidentally did is looked at as on purpose.. I mean, everyone misreads recipes, right? Putting the entire recipe’s worth of booze in the batter when it was just supposed to be a fraction of it is totally ok. We had to adjust the flour because it was a lot more wet than it should have been. And by adjust the flour, I mean add like 2 more cups. Haha, it was a lot of Kahlua. But hey! As it turns out, we also added double the amount of butter the recipe called for so it wasn’t completely my fault!
Tell you what though. I don’t know about everyone else’s, but our White Russian Cookies were the bomb!
We also made a Bloody Mary muffin with a compound butter. I’m not one for Bloody Mary’s, but as a savory muffin with the sweetness of the cherry tomatoes in there along with the compound butter, it was pretty good!
I loved the kitchen we were in too. It reminded me a lot of culinary school oh so many years ago.
There were a bunch of cakes that lined the tables along the back corner wall.
One of my faves was the Wizard of Oz cake, which I later learned was made by Emily Easterly, who I was talking to in the Trend Room, and who also worked on the Cake of the Year. Telling you. Some amazingly talented people over there!
After the Kahlua incident of ’15, we headed to the hallways of the school where we were given a small tour by the Director of the school.
She showed us a map of the world that showcased the different places students of the school are from. You may not think cake decorating and baking is a huge deal, but if people from the other side of the world are traveling to the little spot I was standing on when I took that picture, then you know something special is going on there. Things like that resonate with me and inspire, as they should you.
After going over all the different classes they cover in the school, she brought us to a huge wall where the history of Wilton is laid out. I could tell it’s really something to be proud of if you work there.
Being part of a company that goes back 80 years and is still respected today is nothing to sneeze at. I regret not taking more time to admire the wall and read up on the history of the company. Buuuuuuut then I found the History of Wilton on their site. There’s some good stuff there, you should check it out.
The next stop was checking out a Master’s course that was taking place. I felt a little bad about us as this huge group barging in and interrupting their class, but I can’t say I felt too guilty. I mean, it was probably annoying to the students in the middle of their lesson, but I knew it was probably the only chance I’d ever experience such a class.
So after silently walking around and admiring the work the students have laying around about the room, I tried to hang out around the front of the room where the instructor was speaking to the class.
After that, it was straight to the Wilton Store! My mom, who used to be a Wilton Instructor at Michael’s, aaaaaalways wanted to travel to Wilton HQ for 2 things: to see the school, and to shop at the store. And I must say, it was quite glorious.
After the store we headed back to HQ where we had took part in a taste test! We split off to 5 people per table and were put to the test with the new Treatology Flavor System. We were given 3 different sugar cookies and 2 buttercreams and had to figure out the flavors that were added in. Some had 2 different flavors while the last had a combination of 3 you had to guess. It was crazy fun and I sadly got 3 out of 5.
One of the 3 I guessed right was a sugar cookie that had salted caramel and cinnamon graham. I swear to you, it’s exactly what you would imagine a Bath & Body Works candle would taste like. You know, if it wasn’t made of wax. I knew automatically what it was because it’s my favorite scent. Fall time candles 4 life, yo.
After that, it was our final workshop and activity for the day. How to Dress the Perfect Dessert Table with Jenny Keller. Or, Jenny Cookies, as you may know her.
She told us a lot about how she came to do what she does now, and it was a story I really enjoyed. It was just a completely random set of events that led her to snowball into this crazy successful and awesome life. As if her inspiring story wasn’t enough, she went on to give us a bunch of great and useful tips on how to put together an awesome dessert table. I’m glad it was the last thing we did in the day because it was a perfect time to just sit down and soak in all the information and advice.
After she spoke, we had a chance to practice what she just taught us. We split off into groups again and got to choose from a huge assortment of model cakes, accessories, cake stands, and even got to decorate our own cupcakes. We had free range to do whatever we wanted to do with our table and it was fun coordinating with the team to try and make things work with what we had. We even got to play with the Display Your Way Cake Stand and learned to appreciate it’s versatility when it came to displaying your cake. Our team took home the “Lovely” ribbon and we were quite proud.
And that was the end of my crazy day! The whole group went out for dinner afterwards but I was a bum and decided to try and crash early and get some rest for the drive home. As you may or may not have read in the last post, I traveled with my family because I didn’t want to leave them home. That, and my 5 year old absolutely loves staying in hotels. So we drove from North Carolina to just outside Chicago. It was a long trip but in the end, I learned it was well worth it. If you want to hear more about the actual drive, crazy dark and scary dirt roads, and windmill farms, then be sure to check out my previous post.
I was back and forth on going to the Sweet-Up for a long time. Even when I finally decided yes and told them I was going, I had my doubts. I don’t know if you noticed, but this here is a small blog. Being an ambassador to Wilton is definitely the biggest thing to happen to me around these parts. And even though I’ve been working with them for well over a year, I’m still not used to their generosity when it comes to supporting me and what I do. My wife kept pushing me and pushing me, telling me I should go. Friends were doing the same, still angry at me for passing up the same opportunity the year before. So here I am writing this post, and I can easily say – after the doubting, the pushing, the angry texts telling me to listen to opportunity knocking – I’m so glad I went.
Yeah, it may seem like a no-brainer to go in the first place, but I didn’t notice that until after I started the journey back home. Going to the Sweet-Up was an experience that I won’t forget anytime soon. If there’s one thing that I walked away with, it’s simply inspiration. I went in with a cool head, not really sure what I was going to encounter. And I came out with my mind racing, thinking about the dozens of different things I wanted to learn more of, and practice, and create, and just do. From Amber’s cookies to Jenny’s tables, I am ready to walk down many different roads that have been untraveled by my shoes. If that’s something Wilton set out to do with the Sweet-Up, then kudos to them for accomplishing their goal. If this was an accident and just something that happened while they were trying to show us a good time, then they need far more credit than I could give them.
I know I’m rambling a bit now, so I’ll reel it in in a second. I just wanted to make it clear how humbled I am. I mean, Wilton’s backbone as a company is based off of cake decorating. Have you looked around my blog? I’m a complete sucker for their products, and always have been, but I’m no decorator. So I know I’m insanely lucky to be a part of their team. It should be a testament to how progressive they are as a company. This is a strange and beautiful time we live in, where the internet can take the smallest of voices and project them for the world to hear. To this day, I don’t really know what made them reach out to me and ask me to be on their Sweet Treat Team, but I gotta say, I’m happy and humbled they did. They found me – some dude with a food blog that he updates half as much as he’d like – invited me to their home over 700 miles away, and sat me down at a table in the same room as chocolatiers, bakery owners, and industry professionals. I don’t think it gets any cooler than that.
Here’s to hoping I don’t plateau here. Because I met a TON of amazingly cool and talented bloggers and vloggers that I’d love to learn from and grow with. Who knows, maybe one day I’ll be a great decorator and attending the Sweet-Up is what gave me the push to start practicing. Weirder things have happened in the world.