
REVIEW/Prep Guide | BASSTOP & MASCARRY Nintendo Switch Replacement Shells
ALRIGHT, fun times are ahead so sit back, strap in, and get ready for a ride through the wondrous land of “I’m not happy with my stock appearance so I’m going to change it for the sake of being cool!”
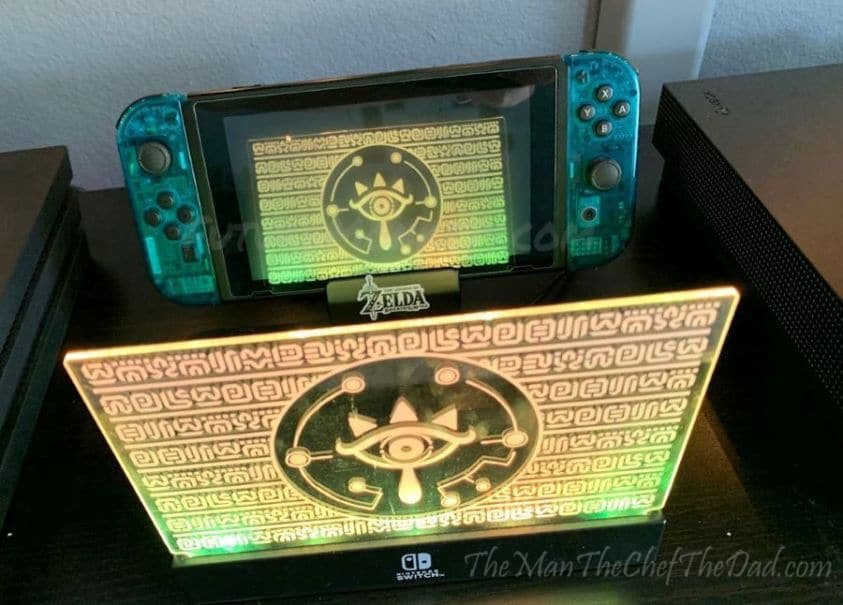
Look, I can’t help that I’m not content with things that ultimately shouldn’t matter. It’s really a curse, to be honest. But… at the same time, it’s a glorious blessing because MAN is my Switch COOL LOOKING!!
The purpose of this post is not to flaunt or point and laugh at you for being stock. No, I’m here to help you! See, I know what you’re thinking. You’re thinking that it does look cool, but you’d never dare dive in and take your precious hardware apart because it’s far too technical. Well, I’m here to tell you how easy it is. Ok, maybe it’s not THAT easy. But with the right tutorial videos, the right tools, and patience, it’s easier than you may think.
I’m going to break this up into a few sections. We’re going to go through the Switch itself, then the joy-cons, then the pro controllers, and finally the dock. No, the dock is not in the video above but I’ll cover here nonetheless. I won’t go into detail on how things are done, but I’ll link the videos I followed along with my experience doing it and what I thought of the process. From there you should be able to tell if you are able to handle it or if it’s better to just stick to being norms.
And that’s totally fine, don’t get me wrong! But like I said, I’m the type to change my phone’s wallpaper every week because I can’t stick to looking at the same thing for long. Knowing there were options to customize what is my go-to console right now, I couldn’t resist the urge to do it. And as you can see, I’m insanely happy with the results. So let’s dive in!
Links and PSA’s
So here’s all the links in one spot, instead of having them all spread out through the post. Amazon links are affiliate links, so clicking and buying through them would help out the site. And I’ll give a little description on what is what. All prices are as of this writing and they tend to go on sale from time to time, so best keep an eye or set a tracker if you’d like.
- BASSTOP Replacement Housing Shell Case Set (Ice Blue) $38.99 – This is the complete set with the back plate for the system and the joy-cons. There are a bunch of different colors, and you can grab the back plate by itself, the joy-cons by themselves, and even a special shell that gives you a D-pad on the left joy-con. I went Ice Blue and I can’t say I have many regrets, though the white shell has had my eye for a very long time and the Atomic Purple seems to be the favorite overall. Doing these replacements will require the tool set below.
- MASCARRY Replacement Shell Case for Switch Pro Controller (Jungle Green) $23.99 – This comes with the front and back plate only, so you’ll be reusing the grips from your original pro controller. They come in a handful of colors including a sleek looking white and an SNES inspired design. I was going for the blue but the green one was on a sweet sale so here we are.
- Pokemon Let’s Go Pikachu Replacement Shell for Nintendo Switch Pro Controller $19.99 – This is a one-shot design and it’s one of my faves. Only featuring Pikachu (no Eevee love?!), and the grips match the colors of the limited edition joy-cons from the Let’s Go Pikachu/Eevee Switch Bundle that came out when the game launched. Bonus: The same company also put out a shell for the pro controller that matches the Limited Edition Smash Bros. Ultimate design. With how good the Pikachu one is, I would get this if you’re interested.
- BASSTOP Portable Dock Replacement Case (Black) $13.99 – This. THIS is a must get. It’s not in the video above but my goodness is it great. It takes your huge, clunky, Switch dock and turns it into this attractive looking stand. It comes in a few different colors and all the tools you need to replace it.
- HORI Nintendo Switch Alumi Case (Zelda Edition) $24.99 – I’ve gone through a few cases for the Switch here. None of them broke or anything, but I just keep changing my need for cases. I have a big one for traveling purposes, a grip for home use when the kids want to play handheld, and now I have this one which is easily my favorite. Its slim profile make it so sleek and attractive, and despite it having no handle or anything, it’s easy to just hold in my hand and take around the house or to the car rider line picking up my kids from school. I don’t play for prolonged periods of time anymore so I don’t really have a need for a grip on the regular, so popping the Switch in and out of this case and in and out of the charger make it so great. Bonus: There’s also Mario, a freaking gorgeous looking Pokemon, and straight black metal versions of the same case.
- Keten Triwing Screwdriver Tool Set for Nintendo $11.99 – This is only needed if you’re doing the BASSTOP Switch and joy-con shell replacements. Digging into the Switch hardware and joy-cons require a triwing screwdriver, which most people do not have. This set is great because it gives you everything you might need, including a pair of tweezers which is a NECESSITY for the Switch system related shell replacements!
- X-ACTO #2 Knife With Safety Cap $5.03 – Also only needed if you’re doing the BASSTOP Switch and joy-con shell replacements. If you watched the video you heard me talk about the issues with the molding of the plastic and how something needed to be cut. This is the tool I used and it worked great.
YouTube Video Tutorials
These helped me out a lot. A ton of pausing and skipping back while trying to keep up but they did good at explaining everything. Be sure to check these out first before you click any purchase buttons so you know what you’re getting into and if you can do it.
- BASSTOP Switch console and joy-con replacement – IGN
- Switch dock taking apart – Spawn Wave
- BASSTOP Switch mini dock assembly – Spawn Wave
- Pro Controller shell replacement – Etradecenter 2012
- Fixing the right joy-con shell issue – Budget Gamer
- Changing the color of your joy-cons in the Switch system – Spawn Wave
- The Joy-Con Toolkit – GBAtemp.net
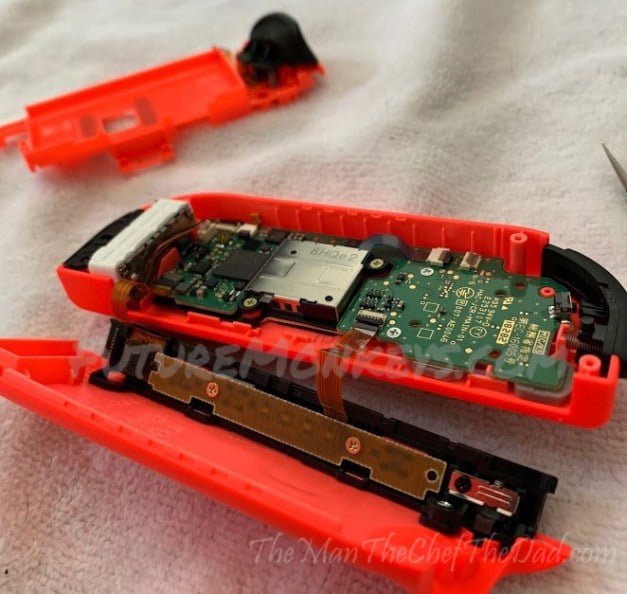
The Switch Console and Joy-Cons

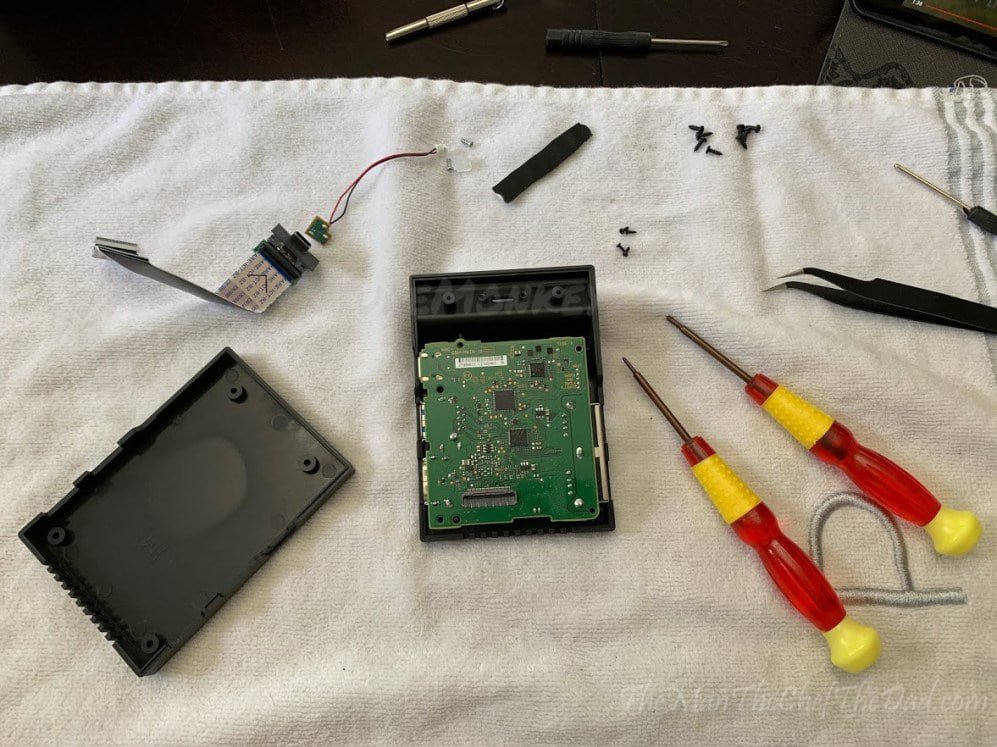
By far, the Switch backplate is the easiest of all the shells to replace. There is no wires to play with, no ribbon cables to accidentally snap. The only fear you should have is accidentally stripping the screws, which can happen if you’re not patient. And really, if you listen to one thing that I say here, it’s be patient with all of this. Set some time aside, chill out, and sit down knowing you’re going to be playing with it for a while.
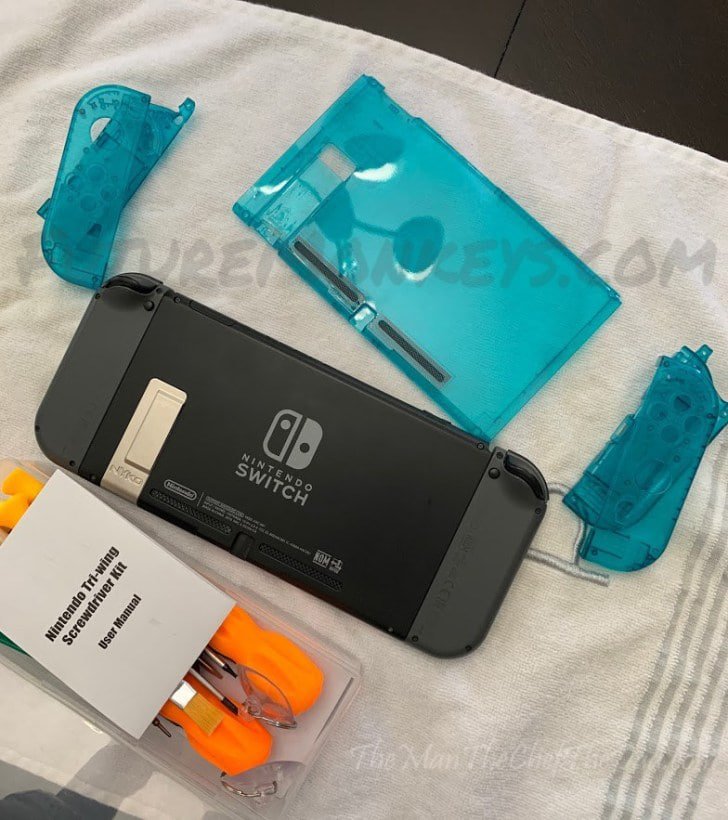
I like to set up a hand towel to work on because there’s a bunch of little screws that will go all over if they’re on a flat hard surface. I also lined up all the stuff I took apart along the top of the towel going from left to right. That way I remembered what went where when I work backwards.
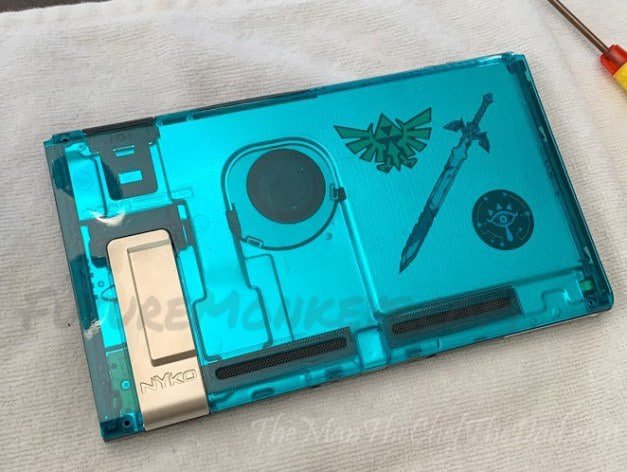
Anyway, the back plate. Simple. Unscrew some screws, pry it carefully open, replace, screw back, you’re done. I put Zelda stickers I bought at Target for $6.99 but if you have something you want to throw back there I think you’ll be fine. I have seen others decorate with stickers behind the replacement shell and I did some quick research to see if anything bad has happened with overheating and found nothing so you should be ok.
I guess this is a good time to mention that I, nor the Future Monkeys Podcast, is not responsible for anything you may do to damage your system, controllers, dock, or anything else. By taking part in this DIY adventure, you are assuming your own responsibility like the adult that you are!
Ok, glad I remembered to say that. Moving on to the joy-cons.
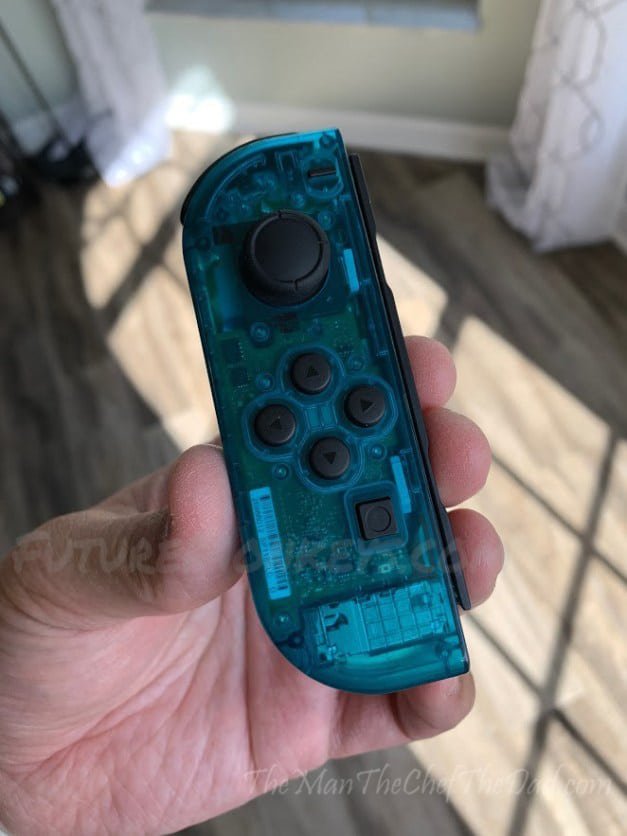
Now THESE were fun. With the console back plate being the easiest, the joy-cons are by far the hardest of these replacement shells. I guess I shouldn’t say hard. Tedious would be the perfect word to describe it. Now, don’t let that deter you. You just need more patience, is all. There’s a lot more that can go wrong but as long as you follow the instructions and you’re careful, you should not have any problems.
I unfortunately ran into a snag. During what is easily the hardest part of the joy-con process (the transferring of the trigger button and the annoying little springs), I managed to snap the middle piece of the new replacement shell in two.
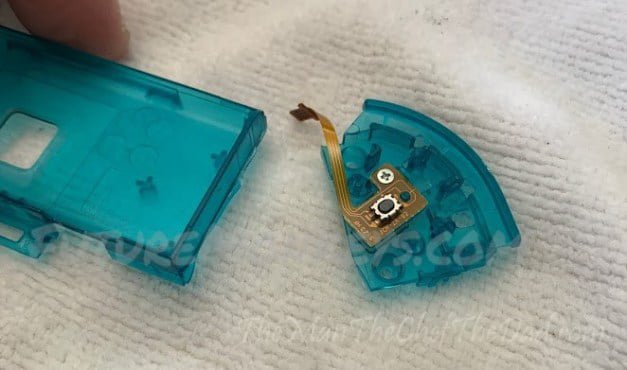
I had a moment of panic, but realized whatever, and used the original joy-con’s middle piece. I could’ve contacted the company and gotten a replacement, I’m sure. But I didn’t want to wait and wanted to be done.
Plus I really like the hybrid look of the two shells coming together.
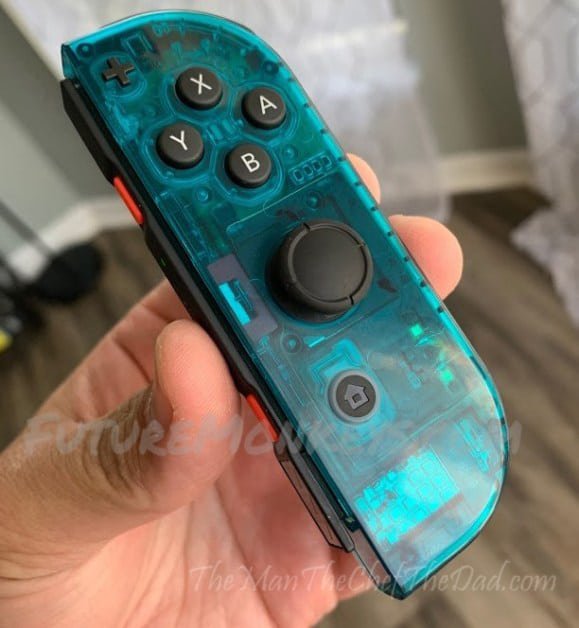
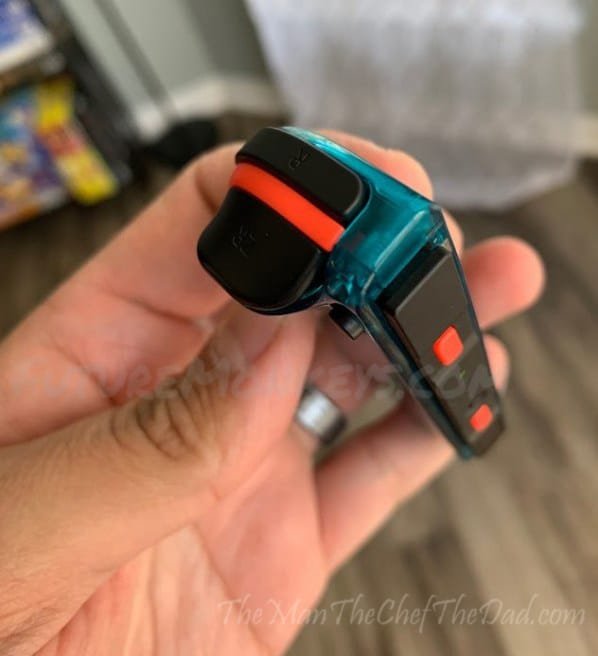
That said, the right joy-con’s reputation precedes it in being the worst of the two. More steps, smaller ribbon cables, it’s just a lot more tedious than the left joy-con. I got to the point where I was scared to do it and thought eh, I’m fine with the neon red and the contrasting joy-cons. But no, I really wasn’t. That neon red hurt my eyes, man! It needed to go. Just be patient and you’ll be fine.
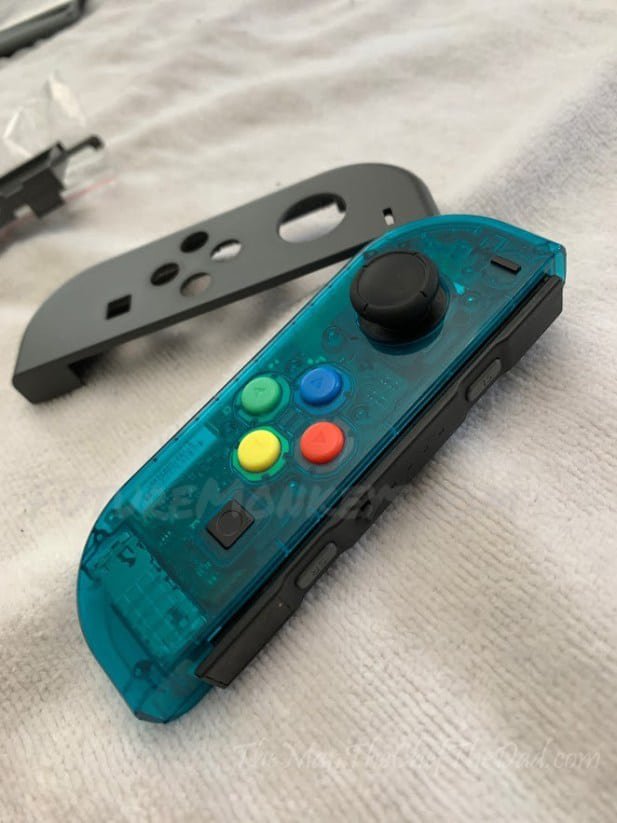
The set comes with replacement buttons. The red, blue, green, and yellow to give it more of a retro look I guess. I skipped out on using them for the sake of balance. I put them in the left joy-con and liked how they looked. But midway through replacing everything I realized my Switch was warping so I managed to get everything put back together to exchange it at GameStop. When the time came to redo the shell replacement, I skipped the colored buttons and love the look of it much more now. Plus, the lettered buttons have a problem where the lettering is simply stamped on so they tend to rub off. The stock Nintendo buttons have the lettering molded into the button so there will never be an issue of fading off.
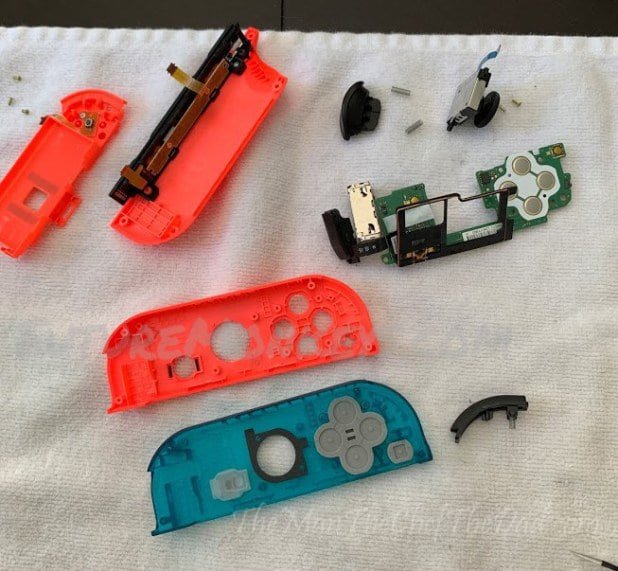
I ran into the issue that some have with the right joy-con where the shell does not close completely. The YouTube video linked above explains where the problem is and with my exacto knife I was able to slice away the troublesome groove with no problem. Be very careful though as it’s easy to slice something that shouldn’t be sliced. The joy-con now closes flush and it sucks that the “updated” version of the shell, which is the one I purchased, was not very updated at all.
The Pro Controller
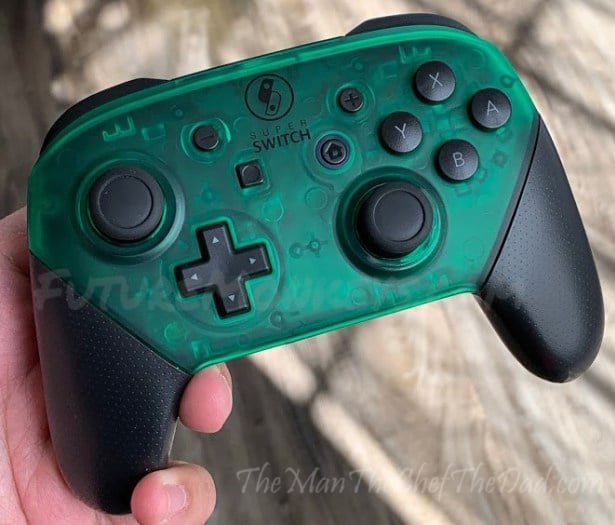
The pro controller is rather simple. You’re taking it all apart but you’re not doing crazy disconnecting like the joy-cons.

It’s simple unscrewing and moving over. The process is rather painless didn’t run into any problems. Again, I opted to not do the colored buttons.

It was awesome to see the little hidden message Nintendo put on the pro controller’s motherboard. I forgot all about it and it made me smile all over again.
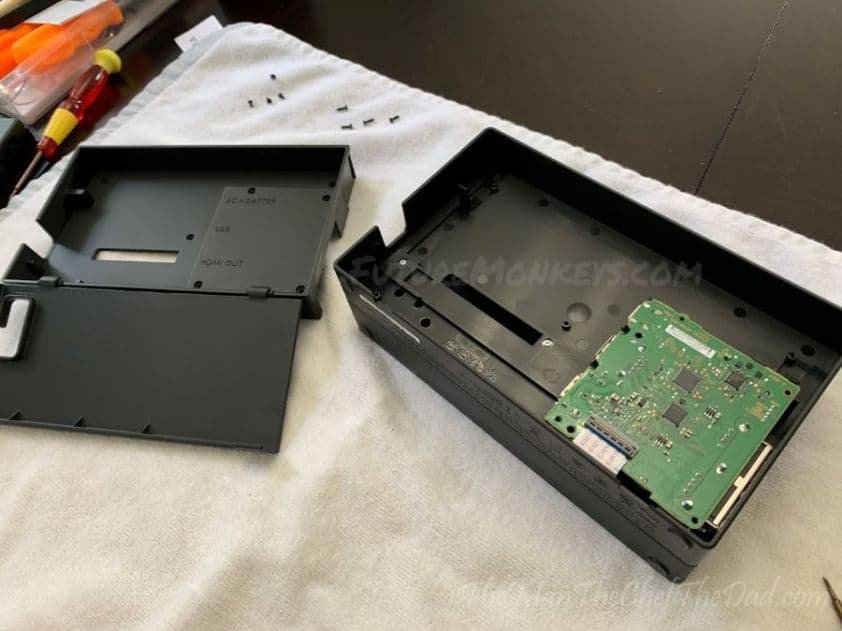
The Mini-Dock
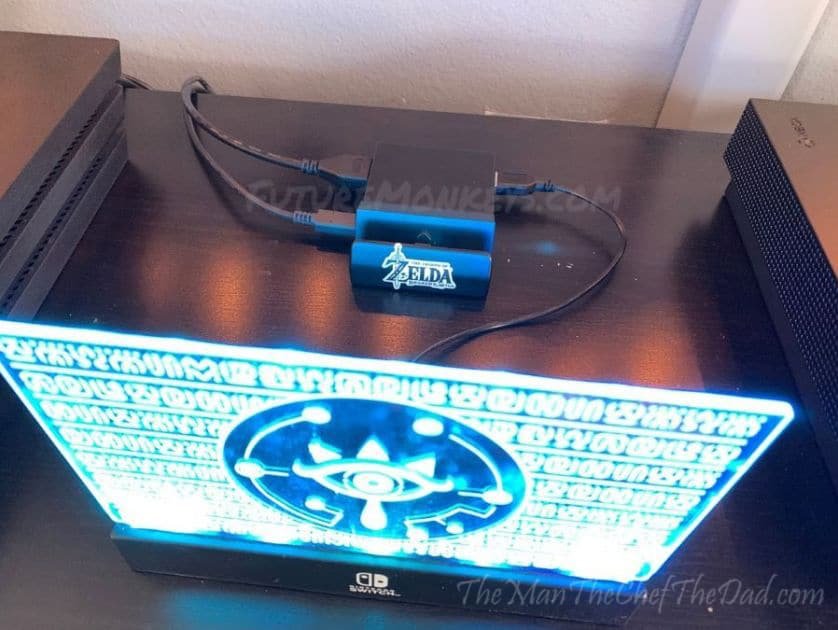
This was another simple replacement. The stock dock, as I like to call it, is a whole lot of bulk for a tiny little board. The thing with the dock though is that it causes the Switch to overheat when you’re playing for long periods on the the T.V. This is the issue that I believe led to my Switch beginning to warp, so I was happy to find this replacement.
You also DO NOT want to go with a third party Switch dock. I know, it’s tempting, but they’re bad news and known to brick systems. Apparently Nintendo puts certain chips in their dock that make it so their stock dock is the only one you can safely use.
Hence why this replacement is so great. You’re changing the bulky, boxy, heat trapping dock, but your really just taking all of its insides and putting them into a smaller, more appealing dock.
Win win!
The Joy-Con color changing tool

Alright this is for my OCD peeps. If you’re anything like me, you need to change the color of the joy-cons in the system to match the actual joy-cons. Because if I had ice blue controllers, and the controllers on the screen were neon blue and red, it would have the capability of causing my head to explode. So if you have a computer that can connect to a controller via bluetooth, then you can utilize this tool that is linked above. Some believe this will void some warranty as you’re tapping into the firmware of the joy-con, and it can be the cause of getting banned from online play… Buuuuuuuuuut that’s a long shot as I doubt Nintendo is tracking anything of the sorts when it comes to playing online. C’mon, think about it. Online is not Nintendo’s stronghouse. Besides that, there is lots of debate going on if this will cause you to get banned but the majority believe you’re safe. Still though, do at your own risk. Do so happily, at your own risk, because my goodness, this is a necessity to complete your modding adventures.
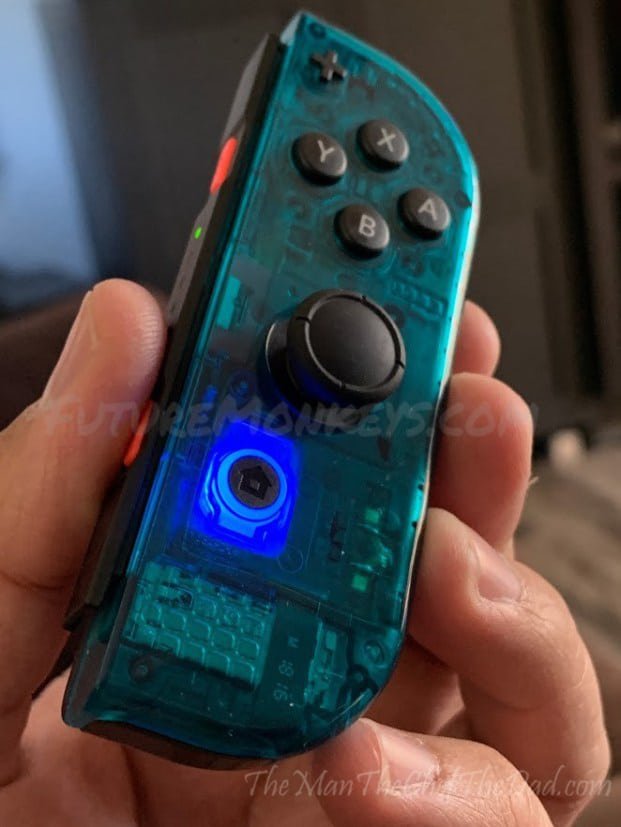
Oh, and a nice little thing you get to see if you hook up your joy-con or pro controller to a PC via bluetooth… The light around the home button! Nintendo holding out on us! Maybe for future updates we’ll see some sort of messaging service where the light will blink when we have something new come in. Can’t wait for that!
Conclusion
FINALLY! At the end! It’s been a long ride but I hope you came out more confident in pursuing this adventure. Or at least more educated in the process? Whatever the case, please remember that I had ZERO intention of making this post what it turned out to be. This is what happens when the kids are in school, you cleaned the house, and you have plans to play the Anthem demo but XBox Live is crapping itself. I got started and it was like a snowball down a hill, getting bigger and bigger and me just riding it.
All in all, I hope you took away that I’m VERY happy with all my endeavors here. My Switch is unique to me now. I’ve always loved personalizing my electronics and going against the stream, so being able to do this made me very happy. I would do it again in a heartbeat with different colors, for sure. And despite the issues I ran into, it wasn’t anything deal breaking. Annoying, yes. Tedious, definitely. But at the end of the day I didn’t lose sleep over anything and I have some sweet looking stuff that I’m proud to know that I did myself. And that’s what DIY’ing is about, isn’t it?
Any questions or comments regarding this, feel free to contact me wherever. I’m not even going to link it because it’s all over this page and you should be able to find it with ease. 🙂